Halloween is a holiday solely dedicated to being creative and having fun, which is why we love getting into the spirit of the season as soon as autumn arrives. From wicked witch hats to not-so-scary spiders and flying paper bats, deck out your home this fall with these affordable DIY decorations. Whether you’re hosting a spooktacular bash or simply want to go all out for this year’s trick-or-treaters, get into Halloween mode with these easy DIYs.
Originally published October 7, 2021. Updated September 15, 2022.
Related: Add a Touch of Magic to Halloween With These Fun DIY Floating Candles
Materials Required:
- Witch hats (as many as you like)
- Fishing line
- Sewing needle
- Scotch tape
- Black construction paper
- Bat template
- Scissors
- Painter’s tape
- Half foam spheres (for as many spiders as you like)
- Black craft paint
- Paintbrush
- Black pipe cleaner
Hanging Witch Hats

Instructions:
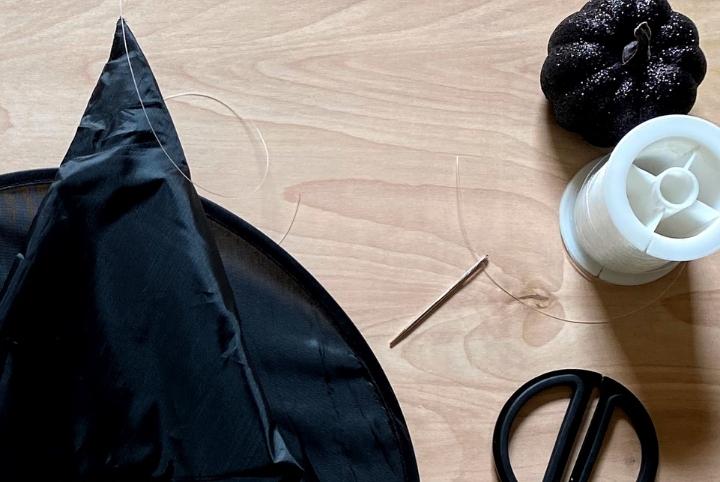
Step One: Cut a piece of fishing line and tie a knot. This is the length that it will hang from your ceiling, so ensure it’s long enough – you can always trim once you’ve hung them up.
Step Two: Thread the fishing line through the needle.
Step Three: From inside the hat, go up and through the tip of the hat and pull the needle through.
Step Four: Repeat this on as many hats as you would like to have hanging.
Step Five: Hang from the ceiling using scotch tape.
Related: Festive Front Porch Decorating Ideas for Fall (Plus Halloween Too!)
Flying Bats

Instructions:
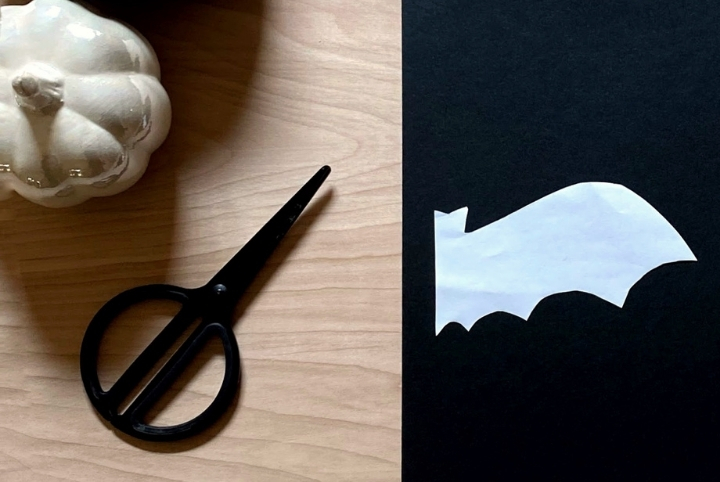
Step One: Cut out the shape of a half bat – you can free hand or use a template.
Step Two: Fold black construction paper in half and trace out the shape of the bat. Make sure that the bat head is aligned with the folded side of the paper. A white pencil makes this much easier!
Step Three: Cut out your bat. Repeat as many times as you like!
Step Four: Hang your bats using painter’s tape so you don’t damage your walls. We added a little curve to the wings to make them feel like they’re really flying.
Related: This Spooky DIY Halloween Wreath is a Fun Way to Greet Trick-or-Treaters

Not-So-Scary Spiders
Instructions:
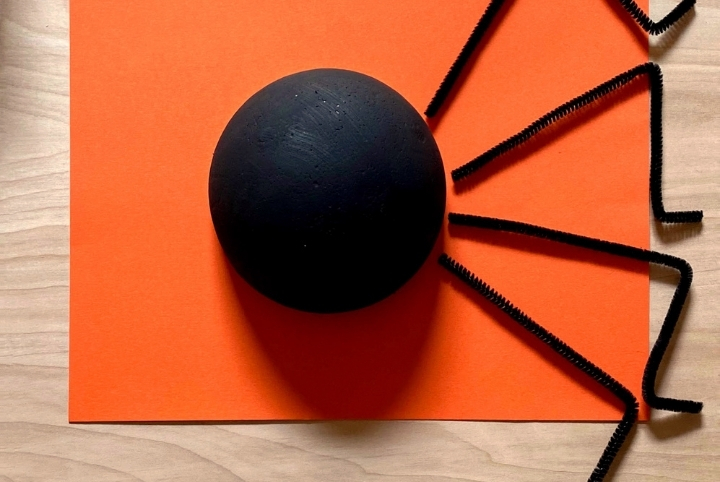
Step One: Paint the half foam sphere black.
Step Two: Trim 8 pipe cleaners by about an inch or so.
Step Three: Bend the pipe cleaners so as to create a “foot” and a “knee.”
Step Four: Attach 4 pipe cleaner legs to each side of the foam sphere.
Step Five: Repeat to create as many spiders as you like.
Step Six: Hang your spiders on your walls using painter’s tape.
Watch this step-by-step guide on how to create these 3 fun and festive Halloween crafts:
Photos and video courtesy of The Craft Aisle
HGTV your inbox.
By clicking "SIGN UP” you agree to receive emails from HGTV and accept Corus' Terms of Use and Corus' Privacy Policy.


