
Tiffany Pratt is the Queen of Craft. Known for her signature colourful style, Tiffany has brought her unique sense of design to HGTV Canada’s Buy It, Fix It, Sell It and Home to Win.
I love dreaming up things that are less traditional and more conversational, while still simple in their materials and construction. My inspiration behind this DIY hanging Christmas tree is small spaces because it is so hard to find a tree that is both impactful, while still magical. I wanted to create something that wouldn’t take away from cherished floor space, or add clutter to an already small room, and would make a great alternative to traditional Christmas trees. The hanging tree I made is created using felt. It’s fresh and graphic, and can’t be tipped over by curious pets! It’s mess and stress-free. See how I made a DIY hanging Christmas tree!
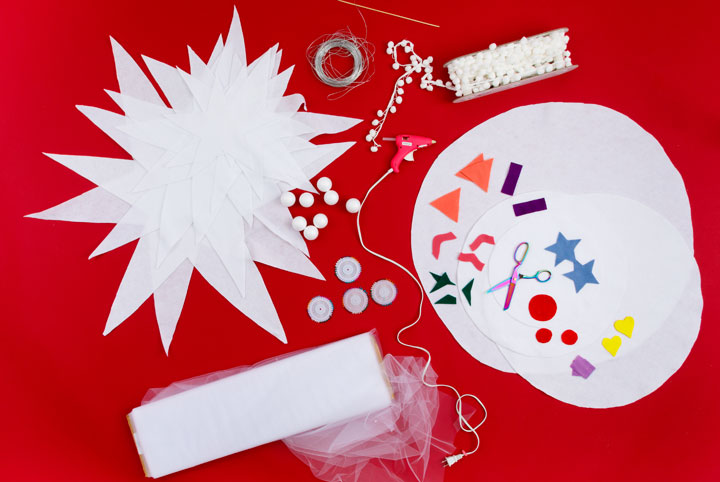
Materials to Make a DIY Felt Hanging Christmas Tree: Lots of felt in whatever colours that you like (you will decide the amount and measurements based on the size of tree that you want to make), fabric scissors, straight pins, tulle, pom pom fringe, a hot glue, thick wire, a hook for the ceiling, Styrofoam balls and a wooden skewer.
Step One: Estimate the Size of Your Tree and Buy Fabric
Do a quick measure of where you want your tree to hang in your home. Taking some simple measurements of how wide you want it to be at the bottom and how tall you want it to be before you head out to the fabric store will help you buy enough fabric for this project. You can make this tree as big or as small as you would like. You can find felt at most fabrics stores so sourcing it for this project will be easy. You can choose to make this tree in whatever colour of felt that you like. Also, you can make all of your felt ornaments in whatever colours you like too. The idea is that it goes with your décor. I love it when trees go with the colour of the décor that you have happening already in the home. It just makes your space feel fun and cohesive for the holidays.
Note: This tree hangs, so remember that the ultimate width that you measure for this will be half of that width once it is hung because the pieces will be dangling.
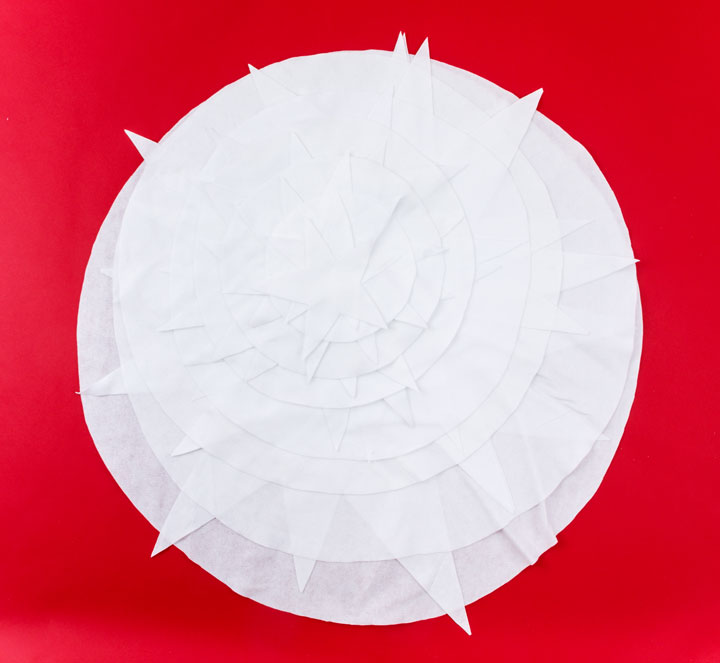
Step Two: Cut Your Fabric into Tree “Layers” of Circles and Stars
Cutting all of the pieces for this is the most time consuming part of this project. The idea is that based on the height of the tree that you want to make you will cut small, medium and large circles and stars out of your main colour of felt. There are no rules here. You can cut as many shapes cascading in size (circles and stars) as you would like. Do not worry about filling the whole length of wire that you will hang from the ceiling. You can fill the space in between with tulle for volume and Styrofoam balls for height. It is totally up to you to decide what shape and height you want it to be. I hot glued Pom Pom fringe to the edges of all of my circle pieces of felt for extra pretty and some festive detail. You do not need to do this, but I think that Pom Poms are always a good idea. That is your call.
Step Three: Assemble Your Tree Layers Along the Wire
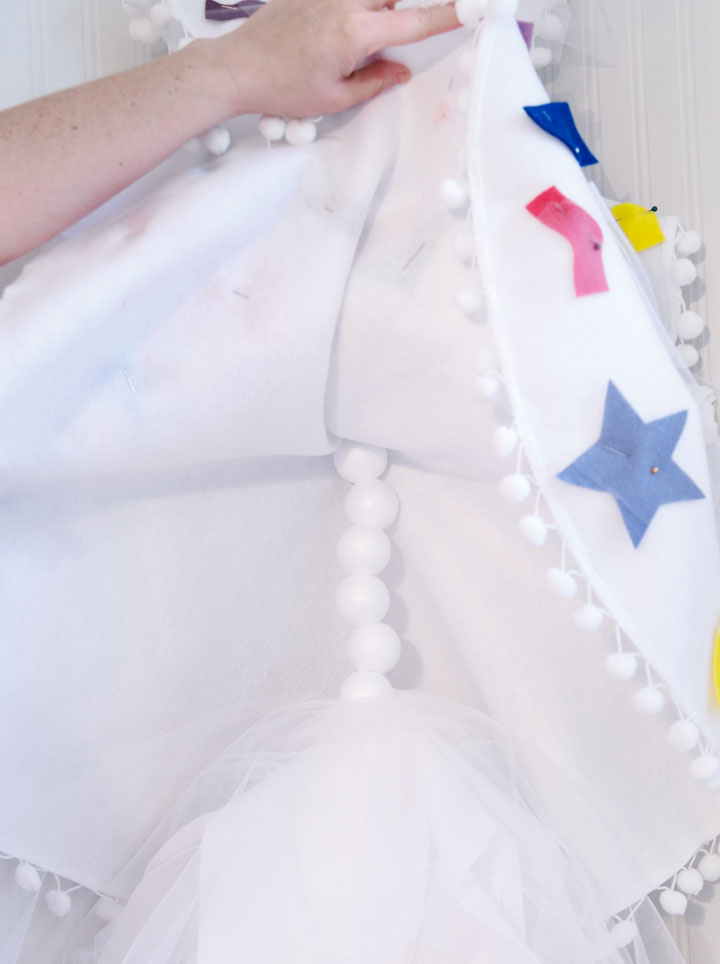
Once all of your pieces are cut you hang a wire in your home in the area you want to hang this tree. I recommend using a heavy gage wire so that it can support all of the fabric strung from it. First tip to start assembling the tree is by preparing all your white Styrofoam balls by poking holes in the center with a wooden skewer so they are ready when you are putting the tree together. Do the same thing with your felt shapes by cutting a slit in the center of the shape for easy hanging. Once this is done you can begin with your smaller pieces and start stringing the felt stars and circles to the top of where you want your tree to be on the wire. I started with three Styrofoam balls, then I added my circle, two stars, a pile of loosely cut tulle and then a stack of Styrofoam balls. Repeat this order and action as you go down the wire with the shapes cascading in size from small to large. Add in as many Styrofoam balls as you wish to make it as long or as tall as you want. Once you get it to the height that you want it off the ground, take one final Styrofoam ball and string it to the bottom piece and loop around the wire.

Step Four: Decorating Your DIY Hanging Tree
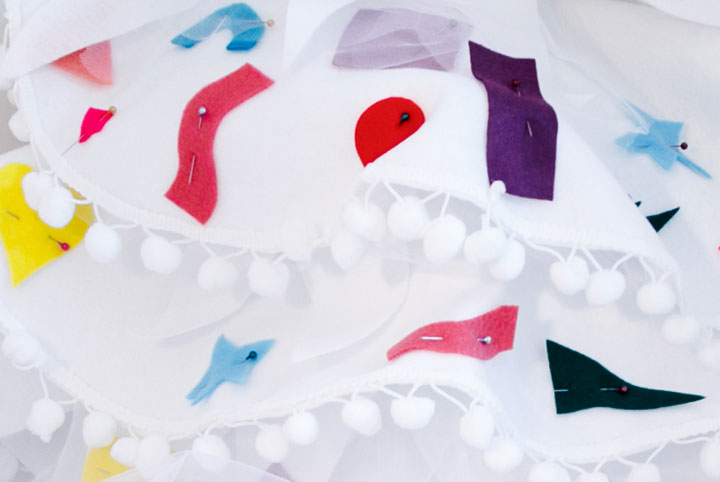
Cutting flat felt ornaments for the tree is a fun way of keeping with the 2D feeling of this piece and making it feel like a cool custom sculpture. You can cut these shapes into anything that you want that match your home or into shapes that make you happy! I did multi-colour in non-holiday colours in any shape that I could think of. I just free-styled the cutting of each shape so no stencil required. The more custom and homemade the better this piece will look. Don’t forget to cut one large star for the top of the tree! Lastly, to hang your ornaments you straight pin each shape all over every layer of your felt pieces anywhere you want. I like buying those cheap and cheerful straight pins from the dollar store with the coloured pearls on the end! Depending on your lifestyle having straight pins on your tree might not be functional. You can hot glue or fabric glue them on instead. If you want to go the extra mile, you can sew them on so that they are there for good! How you attach them is totally up to you and your style and lifestyle. Make it yours!
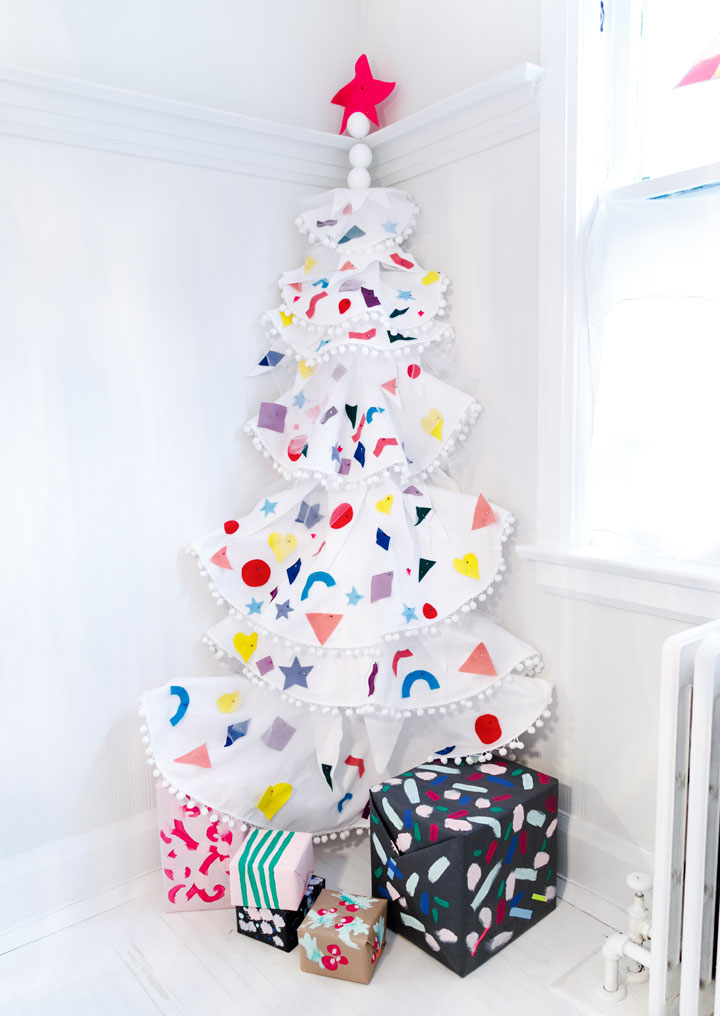
What I love about this idea is the reusability of this DIY. This tree easily unhooks from the ceiling and can be packed into a box or a bag for the next season and put back up year after year. It can be tweaked and added to every holiday season. It can also be hung in a corner or in the center of a space. You can play with scale and because it hangs off the ground, no animals can knock it over. You can make it as big or as small as you would like! The possibilities are endless!
HGTV your inbox.
By clicking "SIGN UP” you agree to receive emails from HGTV and accept Corus' Terms of Use and Corus' Privacy Policy.


