Dreaming of a DIY floor that stops guests in their tracks? Check out these fan-favourite floors from three of our favourite design bloggers, that are surprisingly easy to recreate in your own home. From intricate stencil floors to a geometric design using hand-cut pine (that cost a mere $80) these ideas are beautiful and budget friendly.
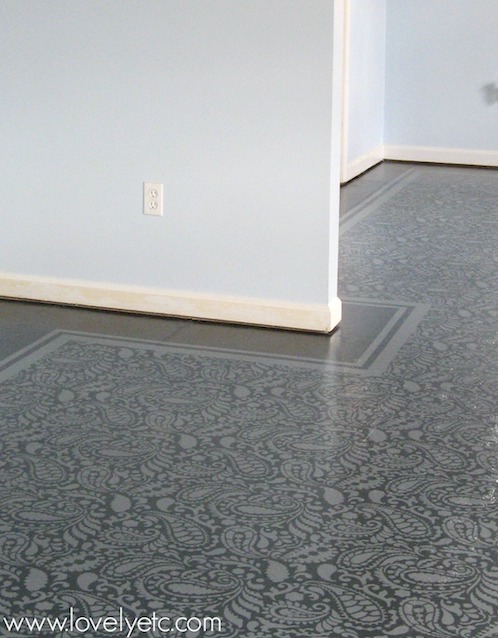
Bold Painted Plywood Floor
This DIY flooring project comes courtesy of blog Lovely Etc., after deciding to yank out an old carpet and paint the existing plywood subfloor, resulting in this bold, dynamic look. The blog’s author, Carrie, admits “this was not a quick and easy project but it was incredibly inexpensive. And it was sooo worth the effort.”
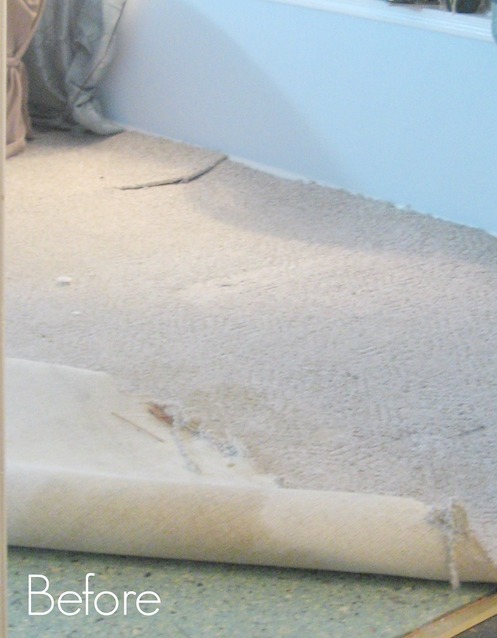
Removing the Carpet
The first step was removing the carpeting and underlay in order to reveal the plywood subfloor.
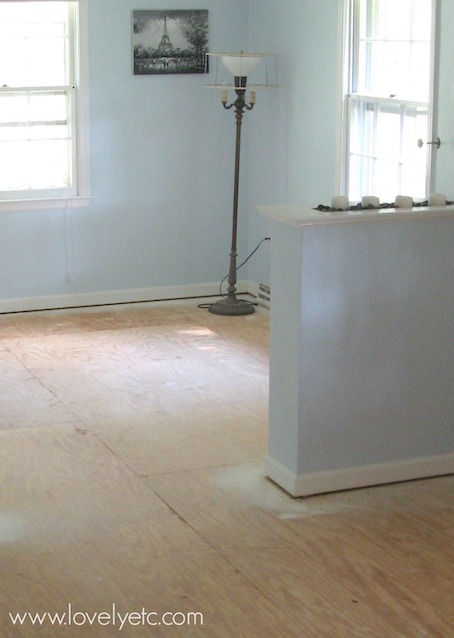
Patch, Seal and Sand
The next phase of the project involved patching any staple holes and sealing cracks between the plywood boards, and then giving the floor a good sanding. Carrie recommends using a palm sander, cautioning DIYers not to go overboard in seeking plywood perfection. “Just remember that this is plywood – it is not going to be silky smooth,” she writes. “The point of sanding is to smooth out major rough spots and smooth any wood filler you used.”
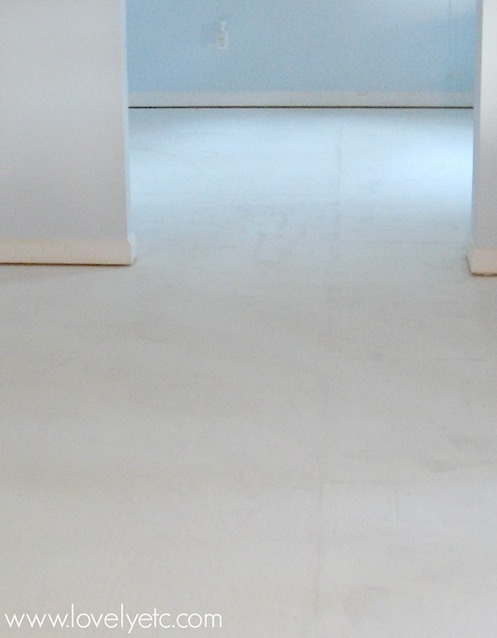
Prime the Plywood
“Before painting, you need to prime the floor with a quality primer,” shares Carrie. “The quickest way to do this is to use a roller with an extension handle and then cut in around the edges with a brush. (Quick tip: if you don’t have an extension handle, most broom handles can do the exact same thing. Just unscrew the handle from your broom and screw it into the handle of your paint roller.)”
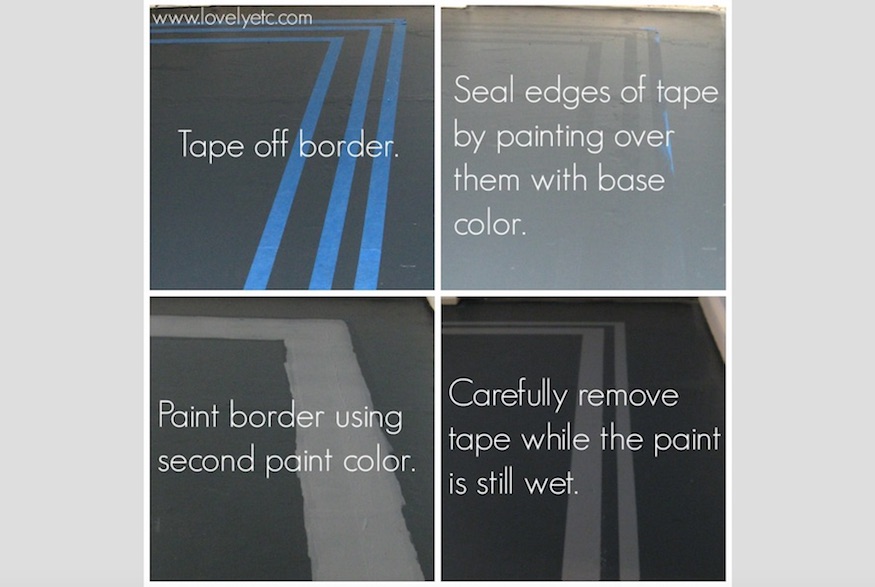
Taping and Painting
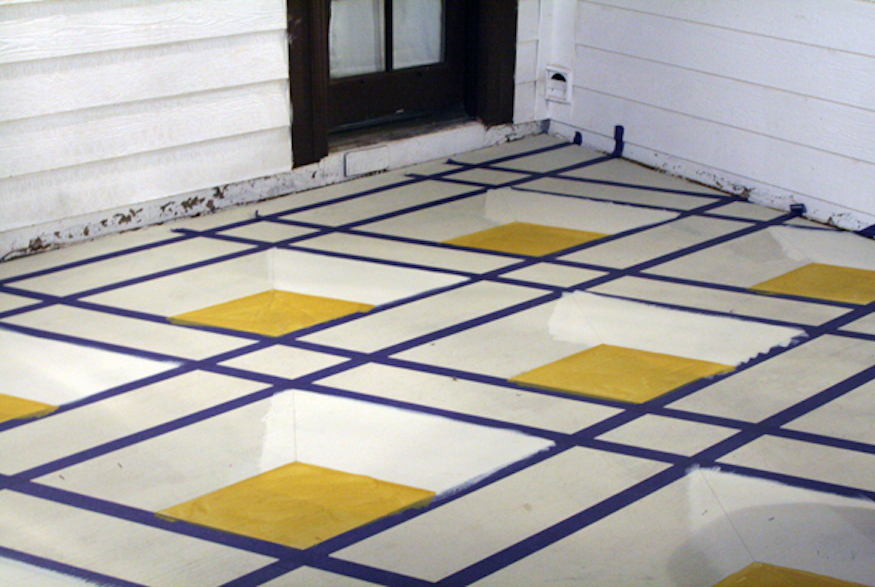
After painting the background colour on the floor, the next stages (above) will prepare the floor for the stencilling to come.
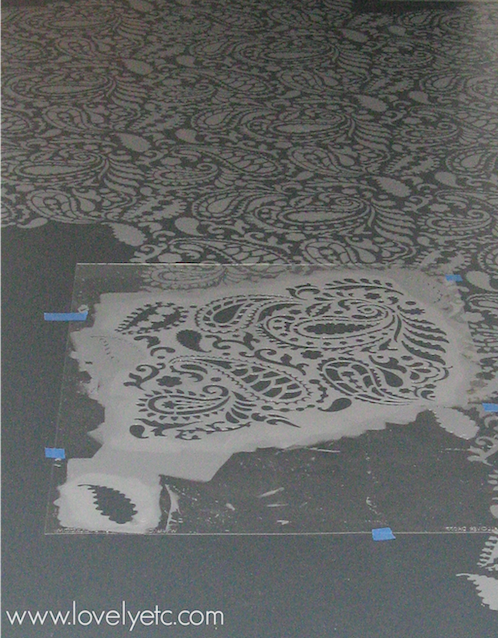
Stencilling
“Place your stencil in one of the corners of the room and use a few pieces of painters tape to hold it in place,” advises Carrie. “Load a small amount of paint onto a small foam roller and roll it over the stencil. You want to be careful not to put too much paint on the roller at a time – too much paint can cause your stencilling to look messy. You should be able to paint the stencil with one thin coat of paint. It might take a couple of tries to figure out the perfect amount of paint to use each time, but then it will go very quickly.
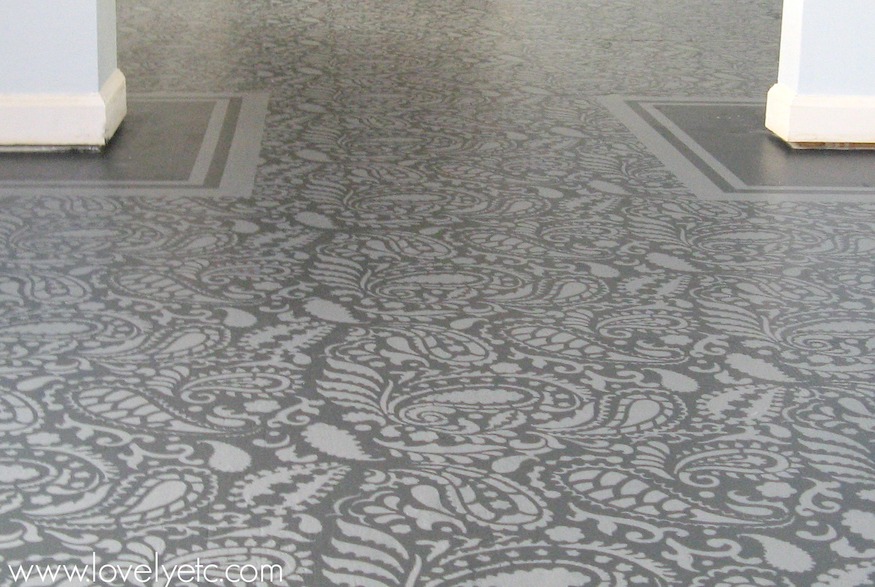
Voila!
The finished floor, which now grace Carrie’s living/dining room areas. “I would say you would need at least a two-week window though, mostly because of the drying times for the various layers,” she explains. “My total cost was between $300 and $400. (I already had some materials on hand so it really depends on if you count those.) This total cost includes the filler, tape, sandpaper, primer, paint and sealer. So in the end these floors cost less than $1 per square foot start to finish.”
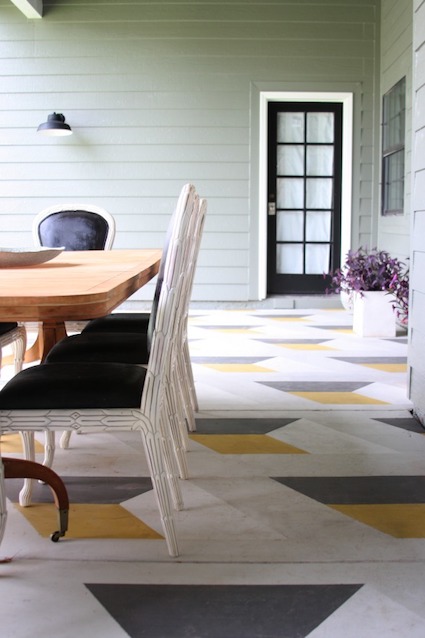
Geometric Cube Painted Floor
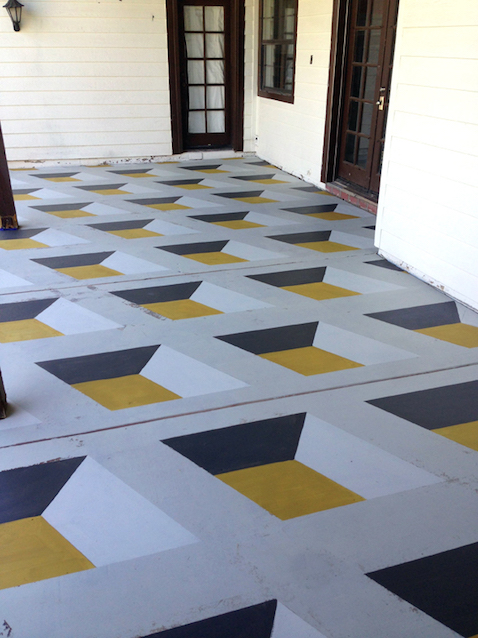
On her Little Green Notebook blog, interior designer Jenny Komenda demonstrates how to create this floor, with painted geometric patterns adding an exciting refresh to an existing concrete floor of an outdoor porch.
Cleaning and Prepping
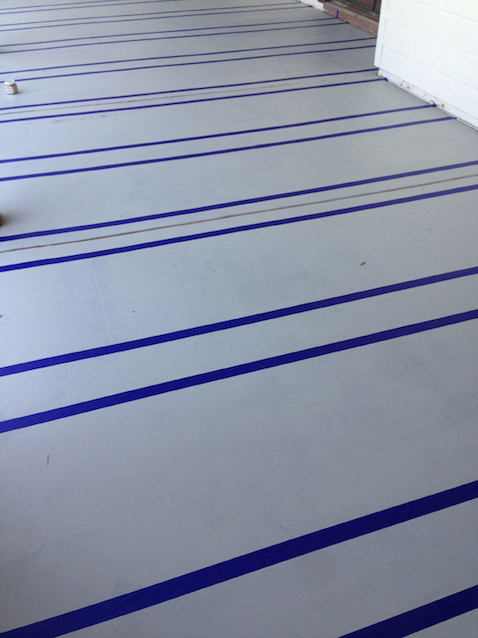
The first step was to thoroughly clean the concrete, and then apply a first coat of water-based porch and floor paint. “I ended up watering down the paint because I wanted the finish to be a little mottled or translucent, so it almost, almost looked like a stain instead of paint,” Jenny explains. “I mostly just didn’t want the solid, flat look of a painted floor. Not that I was trying to age it, but I also didn’t want the floor to look brand new and I think the watery paint helped get that look.” Then the beginning of the pattern was taped out. “We knew we wanted the pattern to be on the larger side, so we made the main criss-cross pattern 12-inches wide,” she adds.
Time for Math
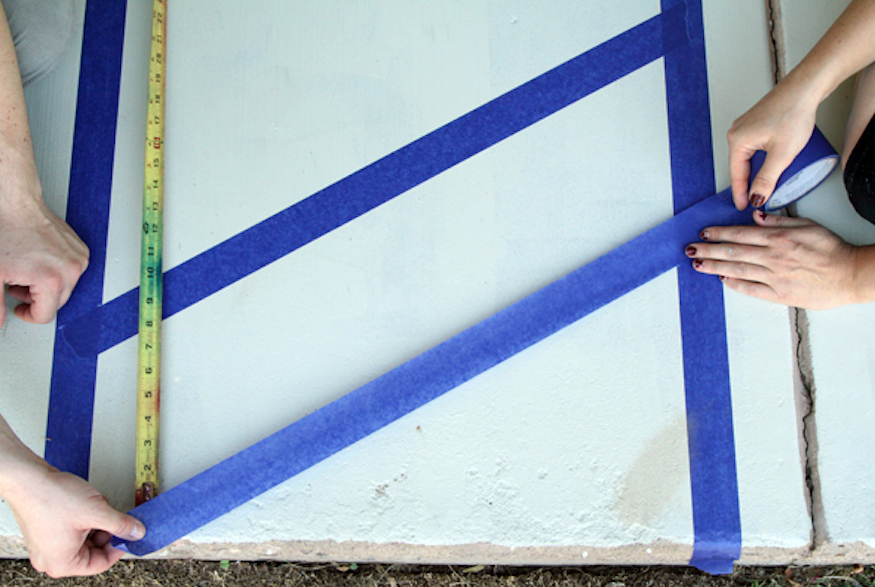
Some math came in handy when it came to figuring out the correct angles. “The most helpful measurement ended up being the hypotenuse (which was a little under 27 and 3/4″). Once we had that line measurement, we could back our way into the distance between the other angles and lines and it was easy to mark and then lay down the diagonal lines of tape,” she explains.
Divide and Conquer
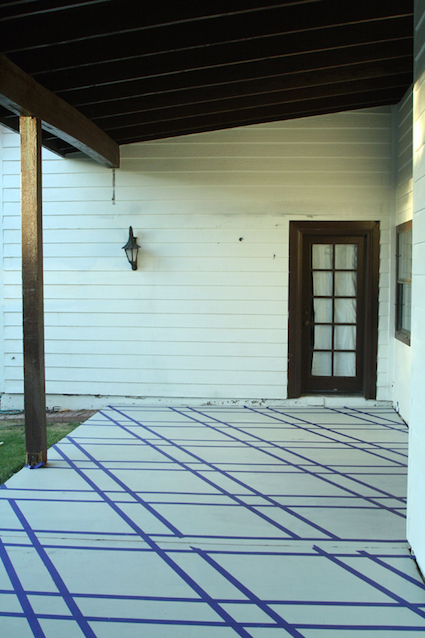
As Jenny explains, “I divided the 27.71 hypotenuse number in half to figure out the dimensions of a diamond. I drew and cut out a diamond shape on poster board and used it like a stencil to trace out the smaller diamond in each of the larger diamonds.”
Intersecting Lines
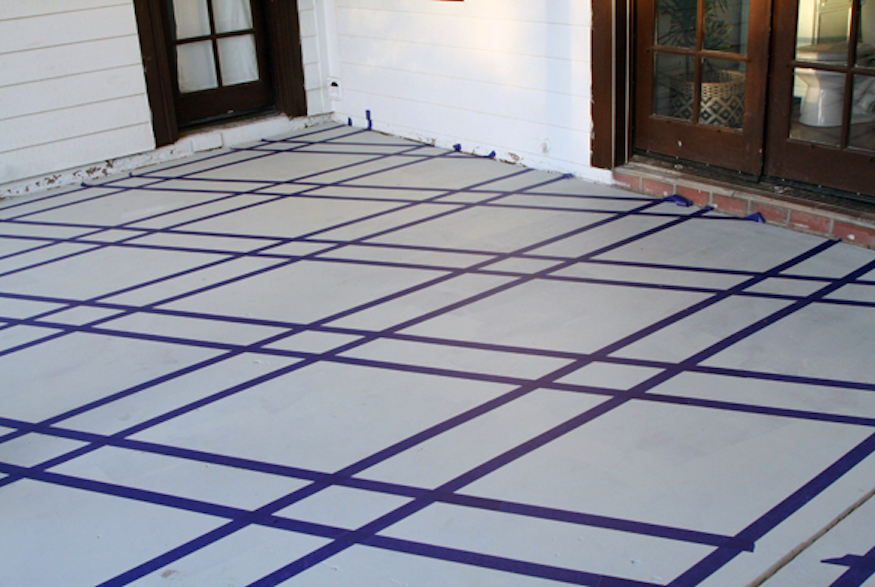
“I also used a straight edge to make a line connecting the side point of the smaller diamond with the larger,” adds Jenny. Now that the pattern had been taped completely, it was time for painting to begin.
Painting
“We watered down more porch and floor paint and filled in the shapes,” Jenny continues.
Finished Floor
“We used Benjamin Moore’s Titanium on the background, the white is Swiss Coffee, the yellow is Ochre and the darkest gray is Martha Stewart’s Seal,” Jenny divulges. “The result was just what I was hoping for. I know this floor is going to take a beating, so I didn’t want it to look too precious from the get-go. We put two coats of porch sealer on top, and so far no big problems with scraping or flaking, even in 115-degree heat!”
Wide-Plank Plywood Flooring
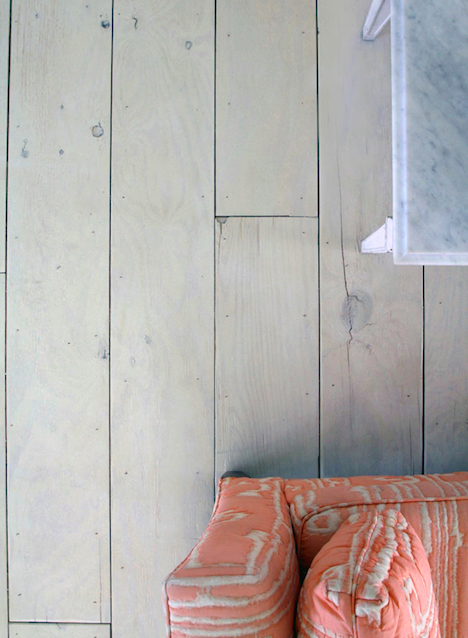
Another DIY flooring project from Jenny Komenda at the Little Green Notebook blog, this one features wide planks of plywood that have been stained white. “I really wanted old-looking white floors for our new studio space,” she explains of why she decided to go with plywood. “I actually saw some interesting, beat-up knotty oak at Lumber Liquidators for a little more than a dollar per square foot, which is practically highway robbery when it comes to wood flooring prices. But it was only about 2″ wide and after laying all that tongue-and-groove flooring on the other side of our house this year, I decided to think outside the box and figure out a way to get wide-plank wood flooring to go in the studio for way, way less.”
Plywood Planks
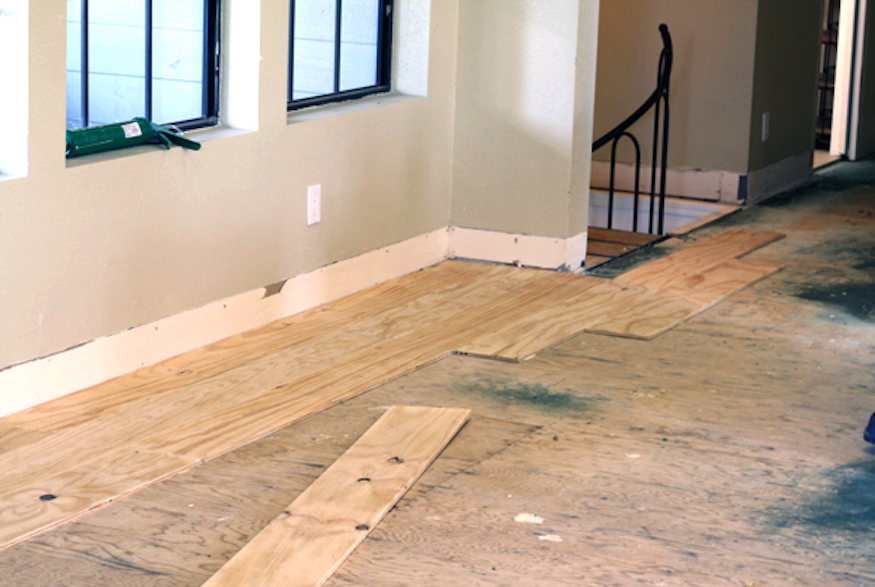
After selecting 4×8 plywood cut into eight-foot lengths, the boards were then sanded smooth. Then came installation. “The installing part was so easy, especially when there weren’t additional cuts needed,” says Jenny. “You’ll want to start on the longest, straightest wall you have. Don’t start on a wall that requires a lot of cuts and notching out – your lines will get messy and crooked really fast. If you start your installation on a long, straight wall and just focus on maintaining even spacing, the planks will look great. You can use a ruler or t-square to help with spacing, but I felt comfortable eyeing it.”
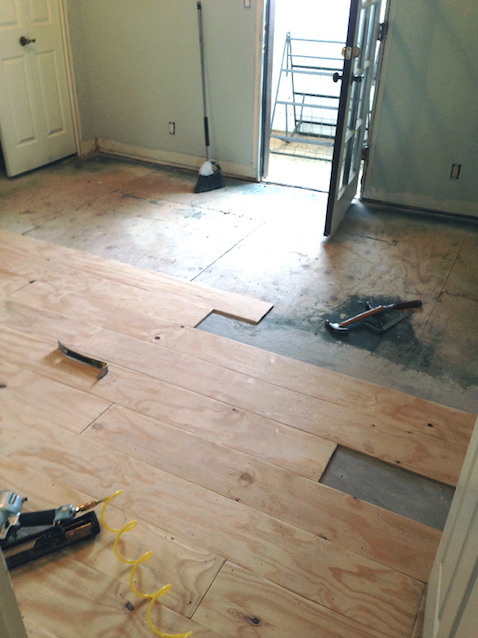
Laying the Planks
“You’ll want a couple of different saws on hand to help with the cutting,” she advises of the planks, which were secured to the subfloor with an adhesive known as Liquid Nails. “I found a miter saw was the easiest and most exact way to cut down the planks shorter. My saw isn’t big enough to cut through a whole plank clean, so I had to cut and then flip the board and cut again. My saw has a laser though, so it was easy to line things up and get an exactly flush cut the second time. It goes faster than you’d guess.”
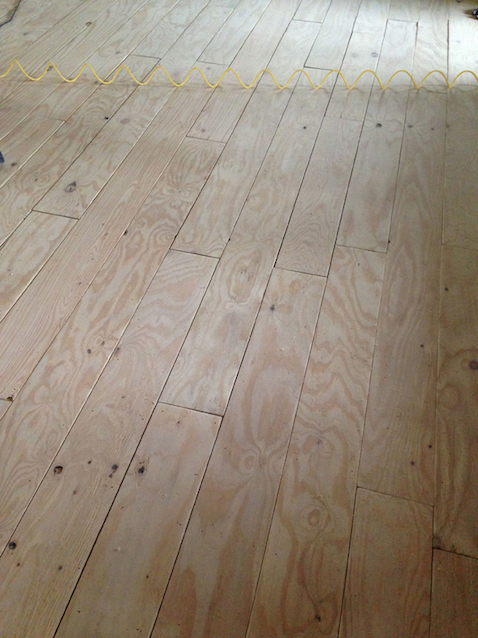
Planks Laid
“The floor went down really fast though, especially when we got past all the cuts and on to the straight laying,” she adds. “Just like with other flooring, you’ll want to stagger the seams and throw in some shortened planks for every two or three full-length planks, just for variation.”
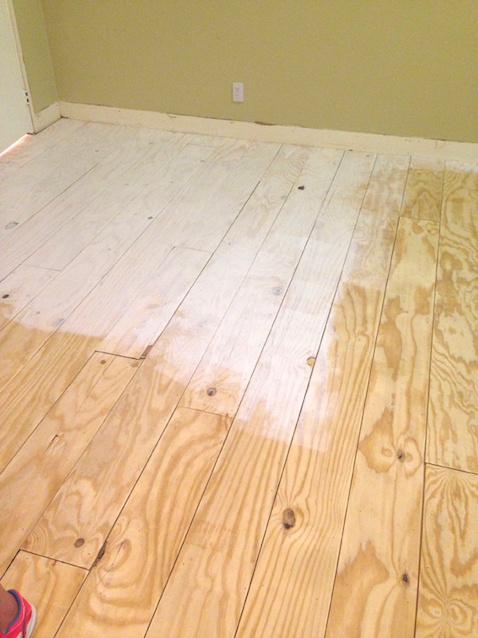
The First Coat
“When the wood was all installed, I wanted to get everything painted and sealed asap, so the raw, freshly sanded plywood wouldn’t get dingy,” she explains. “I painted a few sample planks and I decided I wanted to be able to see a lot of the graining and knots in the planks, so I went for a more white-washed look over an opaque, painted look. I mixed one part water-based primer with two parts water in a big bucket – and it was pretty watery, but I knew it would look right in the end. I used primer because I wanted a chalky, limed look underneath the sealer… You can be really sloppy with this first coat, too, so that the paint drips down the sides of the planks.”
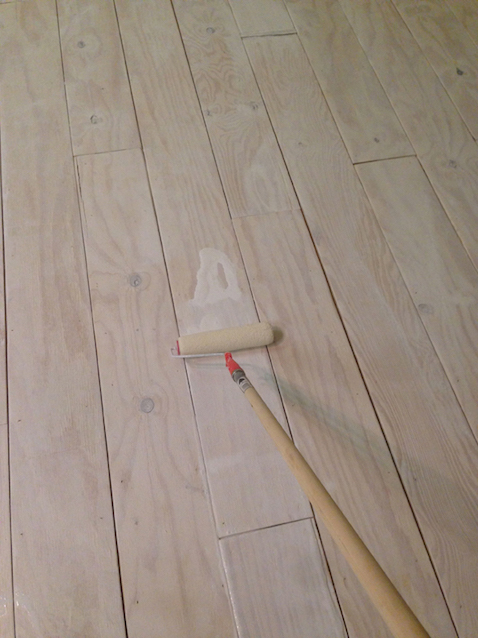
Second Coat
“The second coat smoothed out the colour a lot,” says Carrie. “I tried to paint plank by plank to minimize roller marks (the roller was about the same width as the wood).”
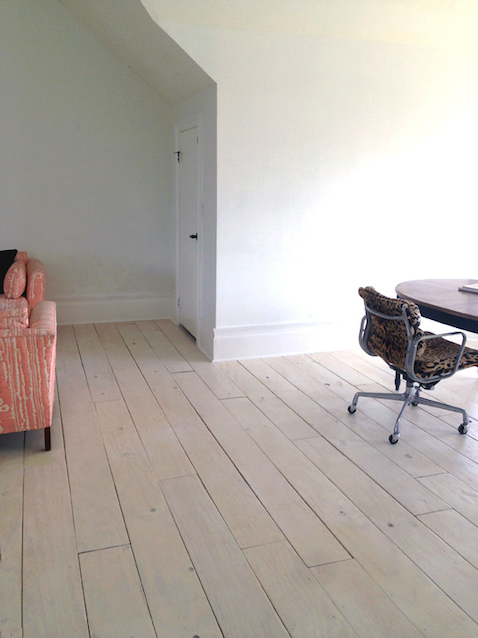
Sealed and Ready!
Finally, Carrie sealed the floor with polyurethane, which had a slight tint that added a colour variation she quite liked. “The poly I used to seal the planks ended up changing the colour a little too, even though it said it was a clear formula. It has some brown to it, which I ended up actually really loving. It made the floors a really pretty, creamy ivory colour with grey undertones.” She adds: “And at only 50 cents a square foot for the plywood, it’s hard to find things to complain about. It’s a great look, especially for the price.”
DIY Herringbone Floor
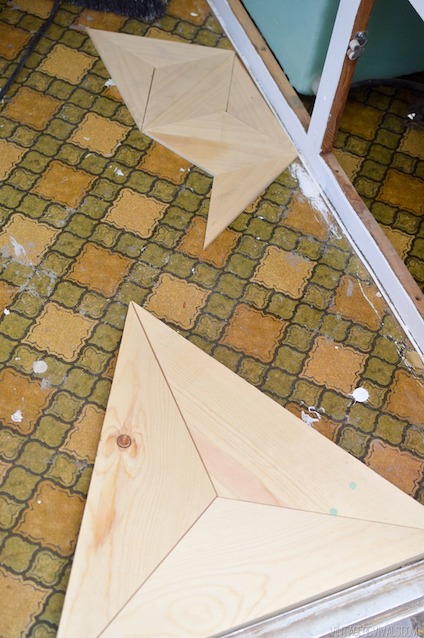
This project from Vintage Revivals involved putting in some new flooring for a 1972 travel trailer. When the original plan – hardwood! – was deemed to be unsuitable due to the temperature swings experienced by a trailer, the solution was hand-cut pine 1x4s. Cost of the entire floor: $80!
Pattern
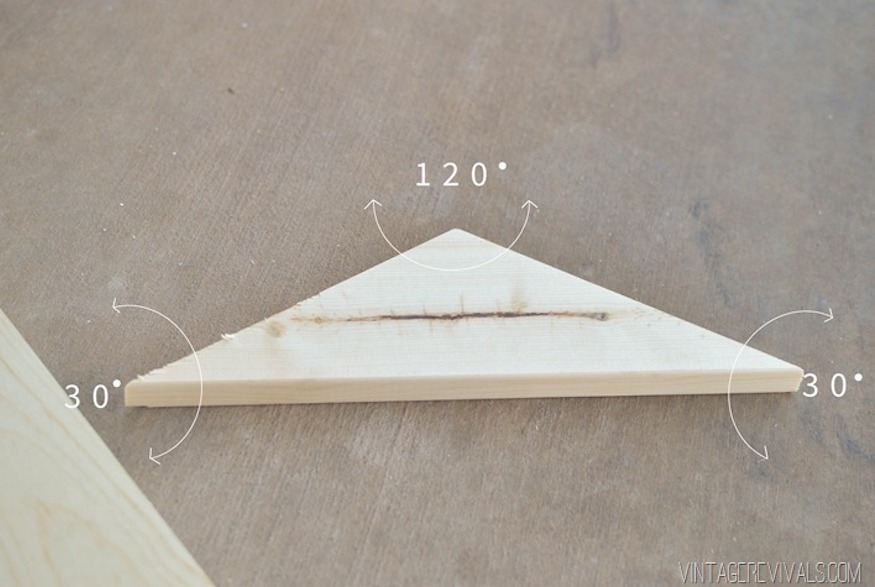
“Once I knew what pattern I wanted, it was just a matter of cutting the wood,” explains Mandi, purveyor of the Vintage Revival blog. “The triangles needed to have 30 and 120 degree angles.”
Perfect Triangles
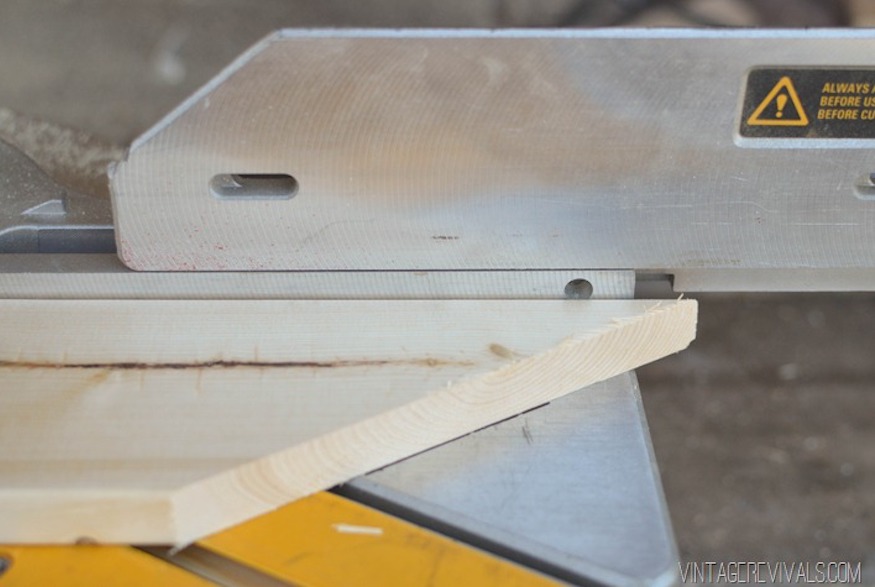
“Using a 1×4 gave us the perfect sized triangles,” says Mandi. “I also tried it with a 1×6 and 1×3s and it is pretty crazy to see just how different the sizing is with adding or taking out an inch or two.”
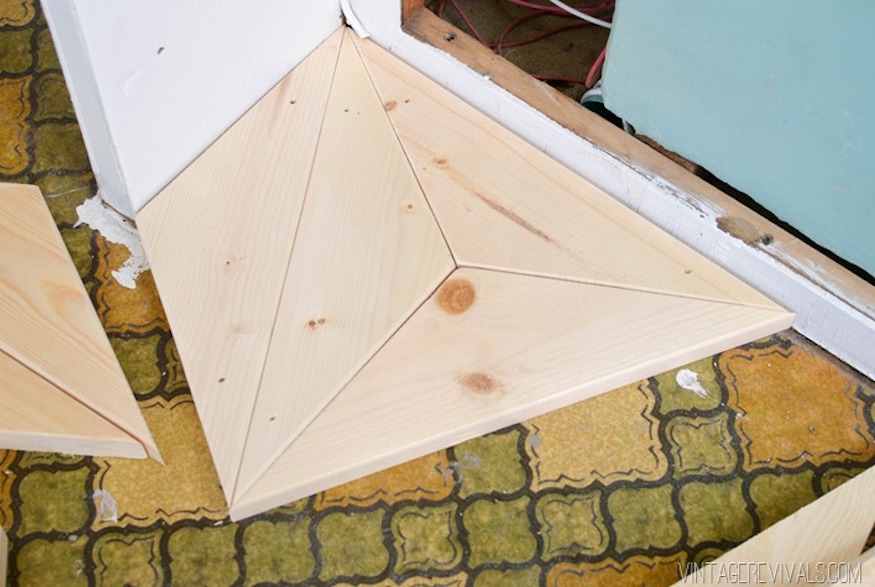
Light Sanding
The pine triangles were laid directly atop the existing linoleum flooring, which was cleaned thorougly and prepped by pulling out carpet nails and scraping off paint and thinset. Then the edges of each piece of wood was lightly sanded to address any knots and ensure there would be no splintering. The herringbone pattern was started in in a corner, initially just dry-fitting the pieces together.
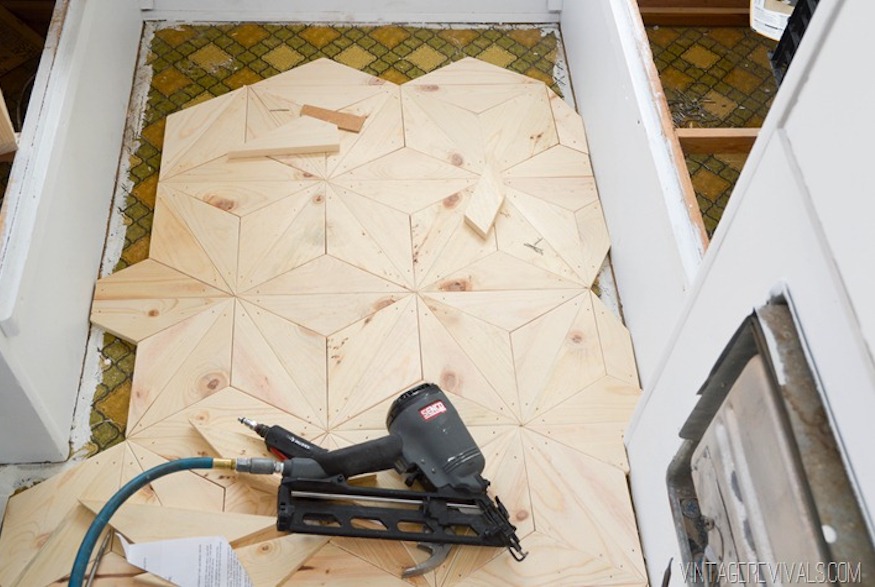
Fitting Together
“You want to work in kind of a big section as opposed to fitting and nailing down each triangle on its own, that way you can make sure that everything is lined up before you commit,” Mandi notes. “Once we were happy with it, we used a finishing nailer to nail it to the floor on each corner.”
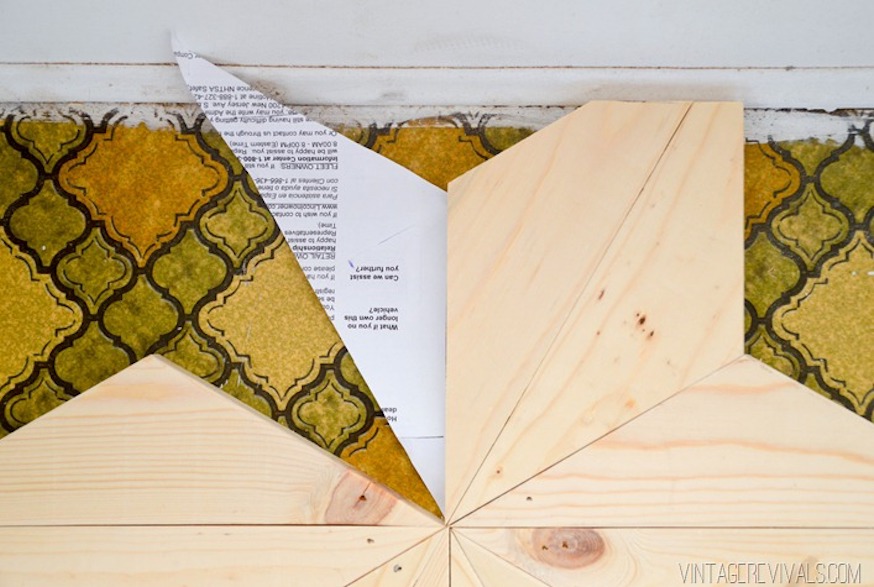
Working the Edges
“Working on the edges wasn’t as hard as you might think,” Mandi explains. “We made a template of the triangle out of paper and after lining it up, folded the paper so that we could see the exact angle that needed to be cut.”
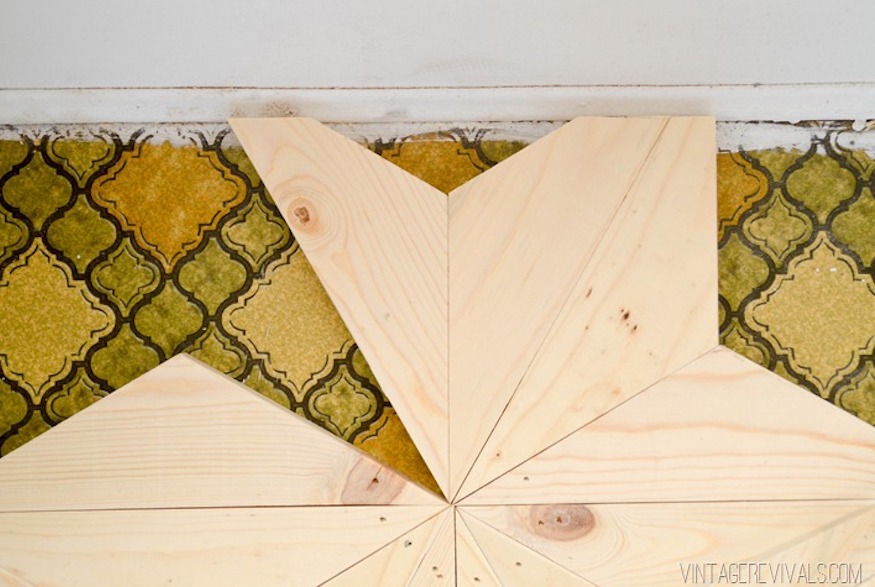
Precision Cuts
Using the folded paper allowed for an easy, accurate way to know exactly how to cut the wood to ensure a snug fit along the edges.
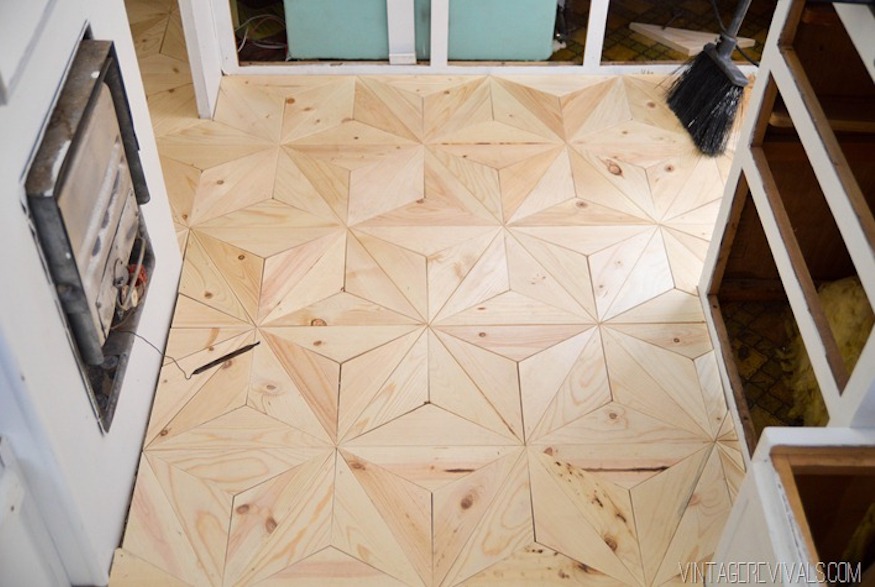
The Finished Floor
Wood filler was used to fill in nail holes, with the floor then completed with a few coats of satin poly-acrylic. “I am completely and utterly obsessed with this floor,” admits Mandi.
HGTV your inbox.
By clicking "SIGN UP” you agree to receive emails from HGTV and accept Corus' Terms of Use and Corus' Privacy Policy.


