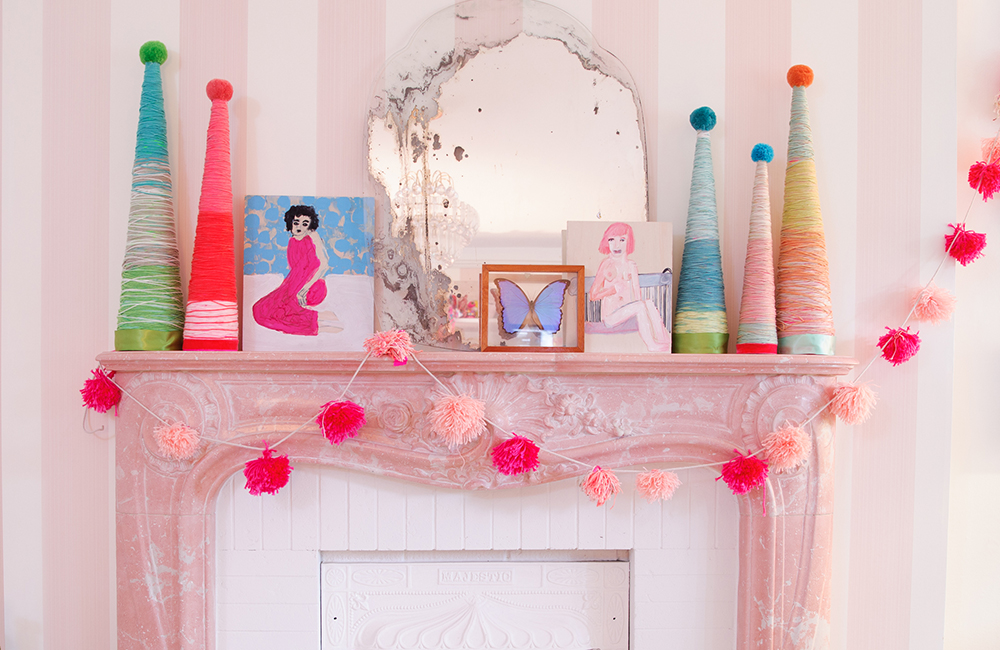
I love adding new handmade elements to my holiday decor during the festive season. This year, I used inexpensive crafting materials to create rainbow-bright yarn trees and pompom garlands to adorn my mantel. The result? A gorgeous, colourful display that promises put anyone in the holiday spirit!
Tiffany Pratt is the Queen of Craft. Known for her signature colourful style, she’s brought her unique sense of design to HGTV Canada’s Buy It, Fix It, Sell It and Home to Win.

Yarn Trees
These cheerful yarn trees will add a splash of colour to any mantel or table setting. I recommend making them in various heights for extra interest and dimension. Change up the yarn colours or stick to one, depending on your holiday palette. Who says the holidays should prescribe to a certain colour scheme, anyways? Read on for DIY instructions!
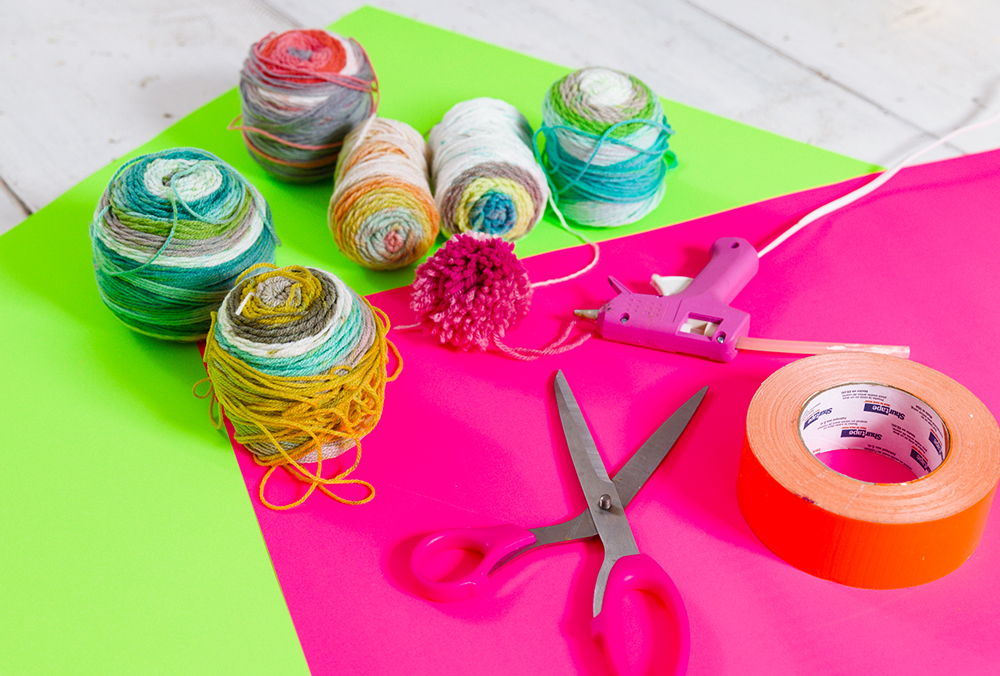
Yarn Trees: Materials
Here’s what you’ll need: various colours of yarn or string, a thick band of ribbon, Bristol board, an assortment of pompoms, duct tape, scissors and a hot-glue gun.

Yarn Trees: Step One
Cut the Bristol board into a few sizes of rectangles (one rectangle per tree). Roll the Bristol board into cone shapes, and use the duct tape to hold each cone in place. Trim the bottom of the cones with scissors to make the edges even, which will allow the cones to stand up on their own.
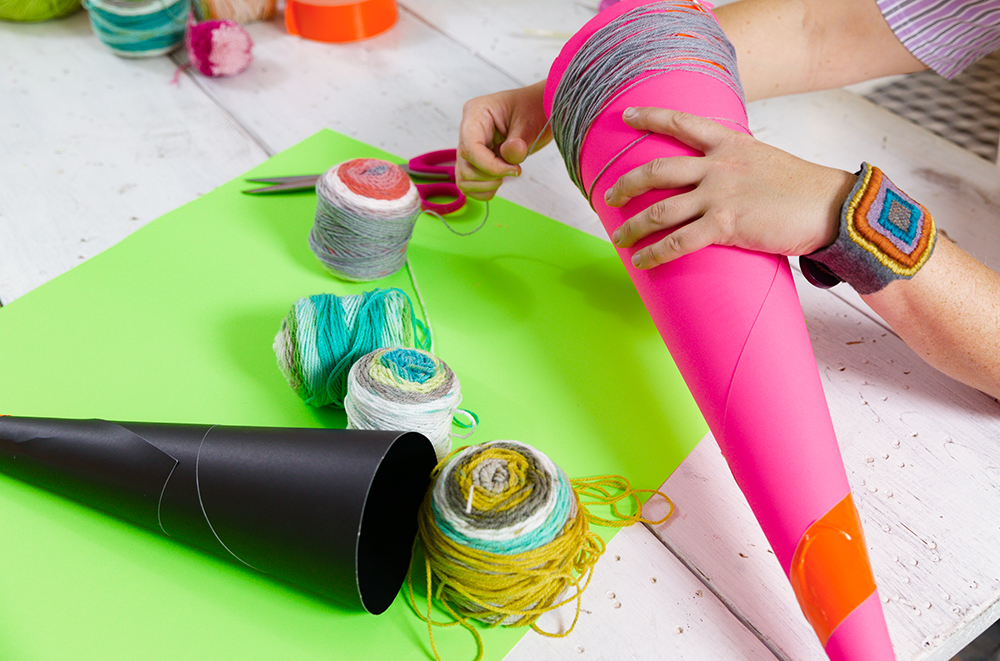
Yarn Trees: Step Two
Grab your yarn and use the hot-glue gun to attach the end of the yarn piece to the bottom of the cone. Then get wrapping! Cover the entire cone in loops of yarn. When you add a new colour, be sure to once again attach the end with a dot of hot glue before you wind it around the cone.
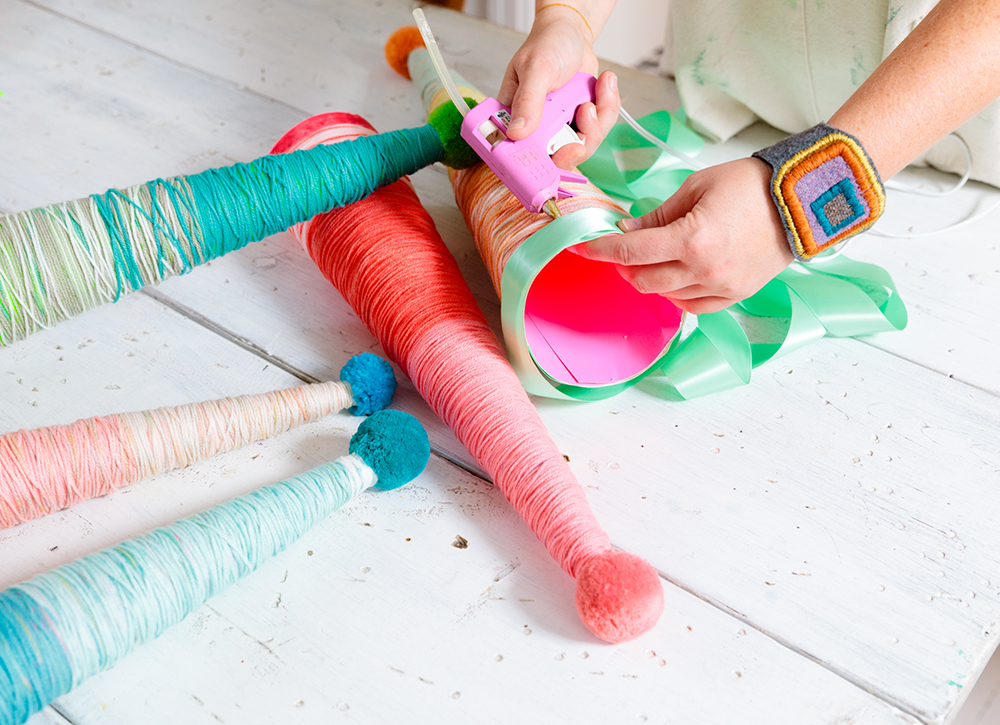
Yarn Trees: Step Three
Once your cone is completely covered in yarn, trim a piece of ribbon to cover the circumference of the bottom edge of the cone. Finally, glue a pompom to the top of the tree.
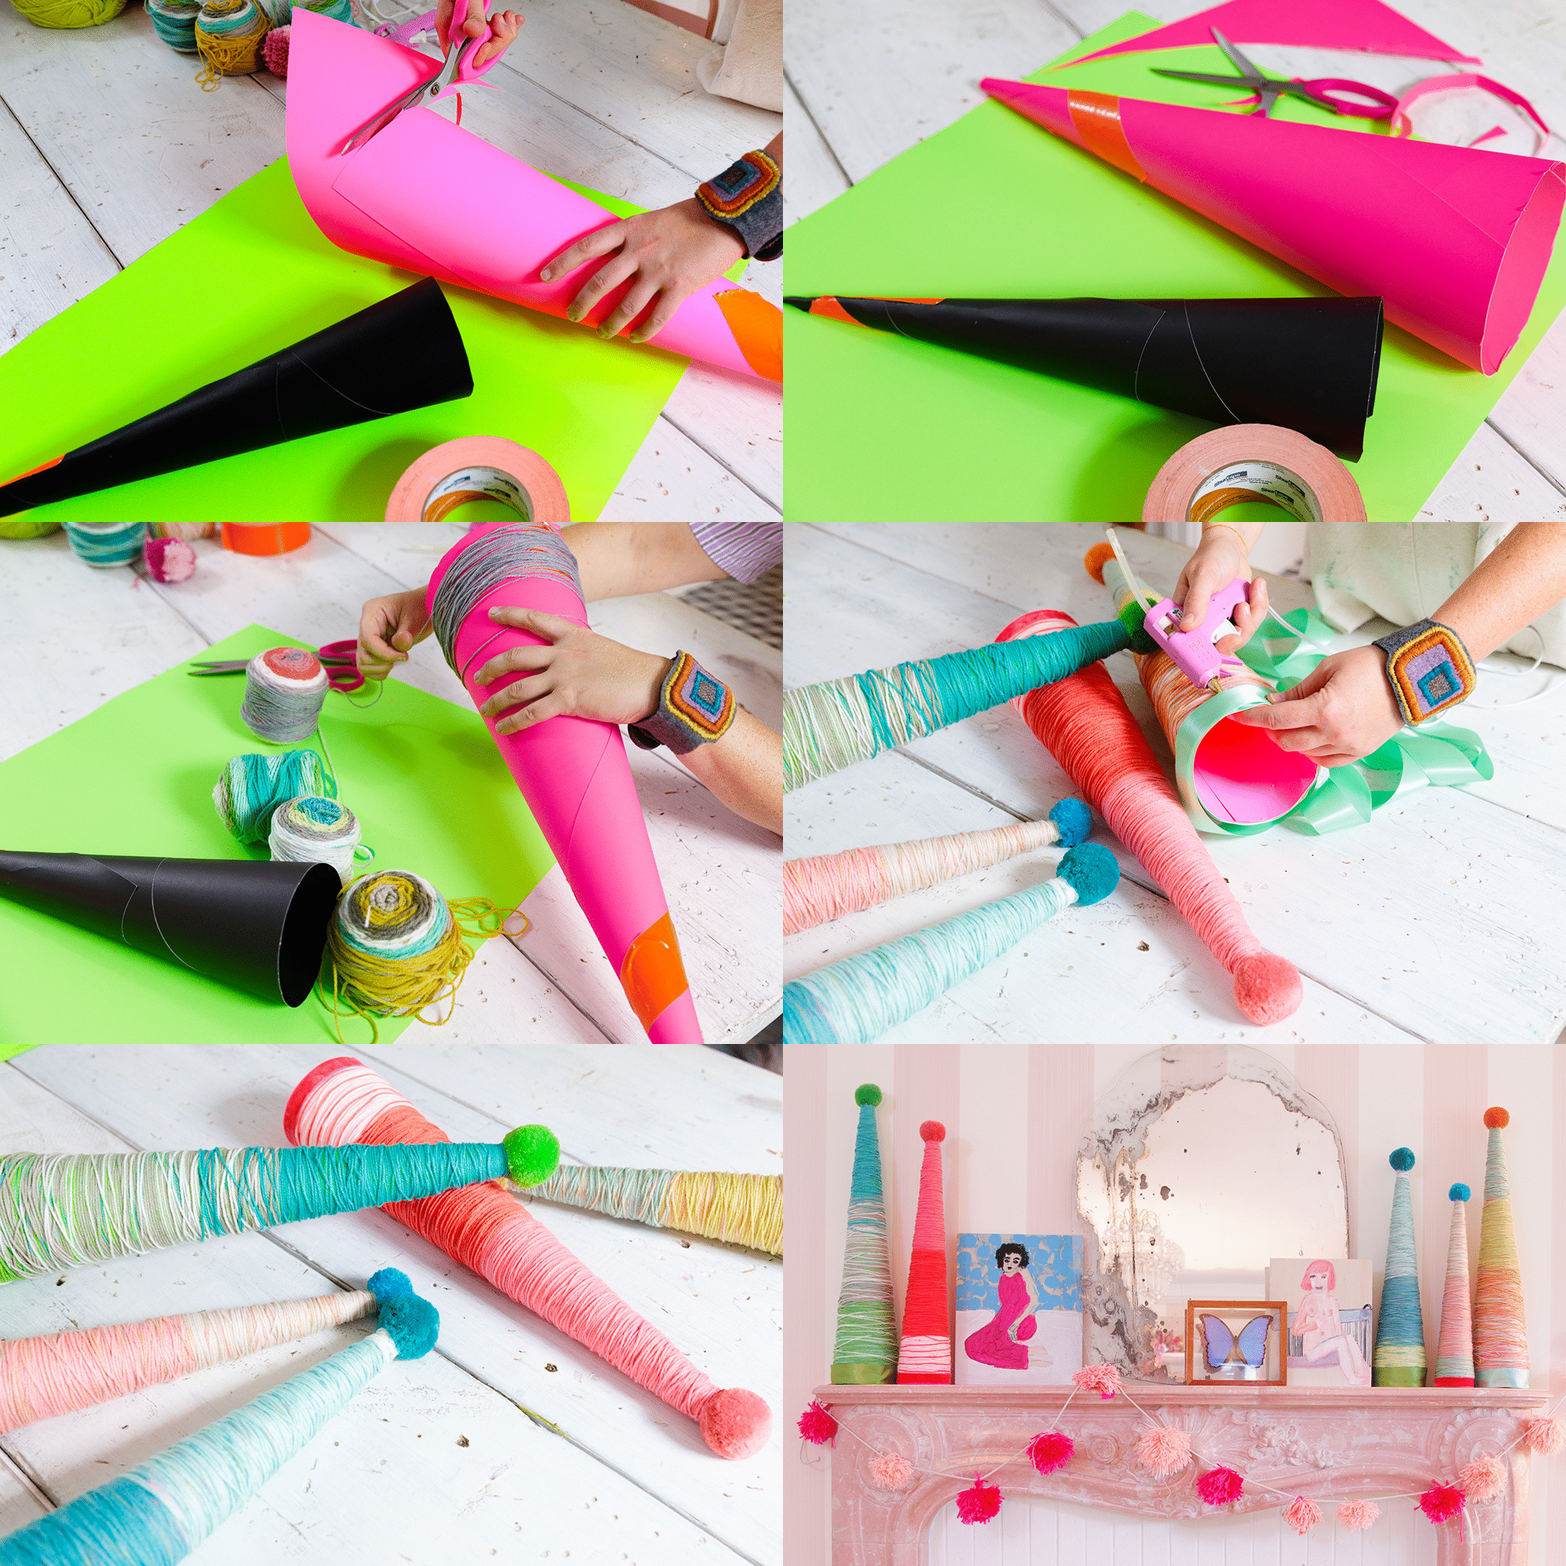
Yarn Tree: Final Product!
Voila! Festive holiday yarn trees you can show off year after year. Or maybe throw a buckle on the front and poof – they transform into elf hats! You could even use metallic thread and larger pompoms to create holiday angels. Unleash your creativity and make them your own. Looking for a thoughtful hostess gift? Here’s a sweet DIY candy box wreath!
Pompom Garland
I love pompoms! They’re like little fuzzy fireworks that add a burst of colour and excitement to any space. This DIY garland couldn’t be any easier to create, either. It’s so much fun that you might just want to keep it up after the rest of your holiday decor gets packed away for the season.
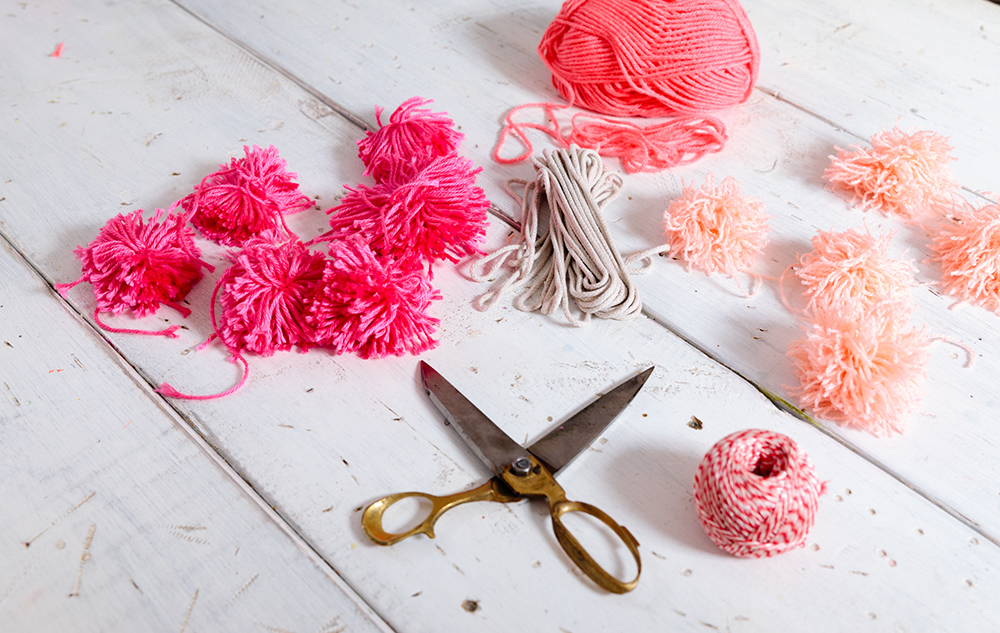
Pompom Garland: Materials
Here’s what you’ll need: yarn in the colours of your choosing (I had to throw more pink into the mix for my home!), string or cord (something a little more sturdy than yarn) and scissors.
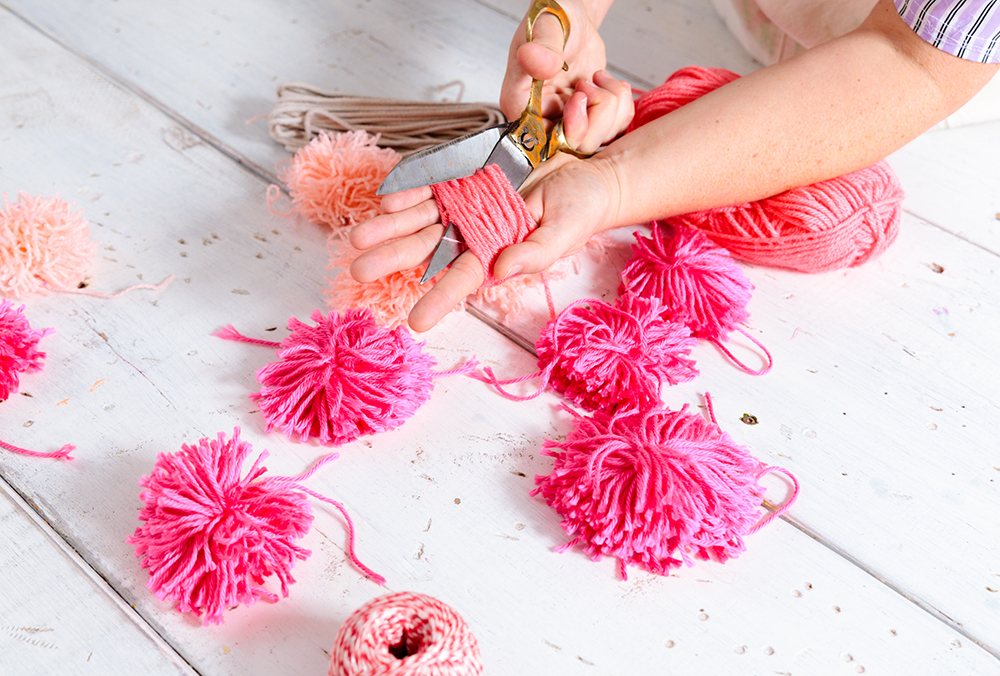
Pompom Garland: Step One
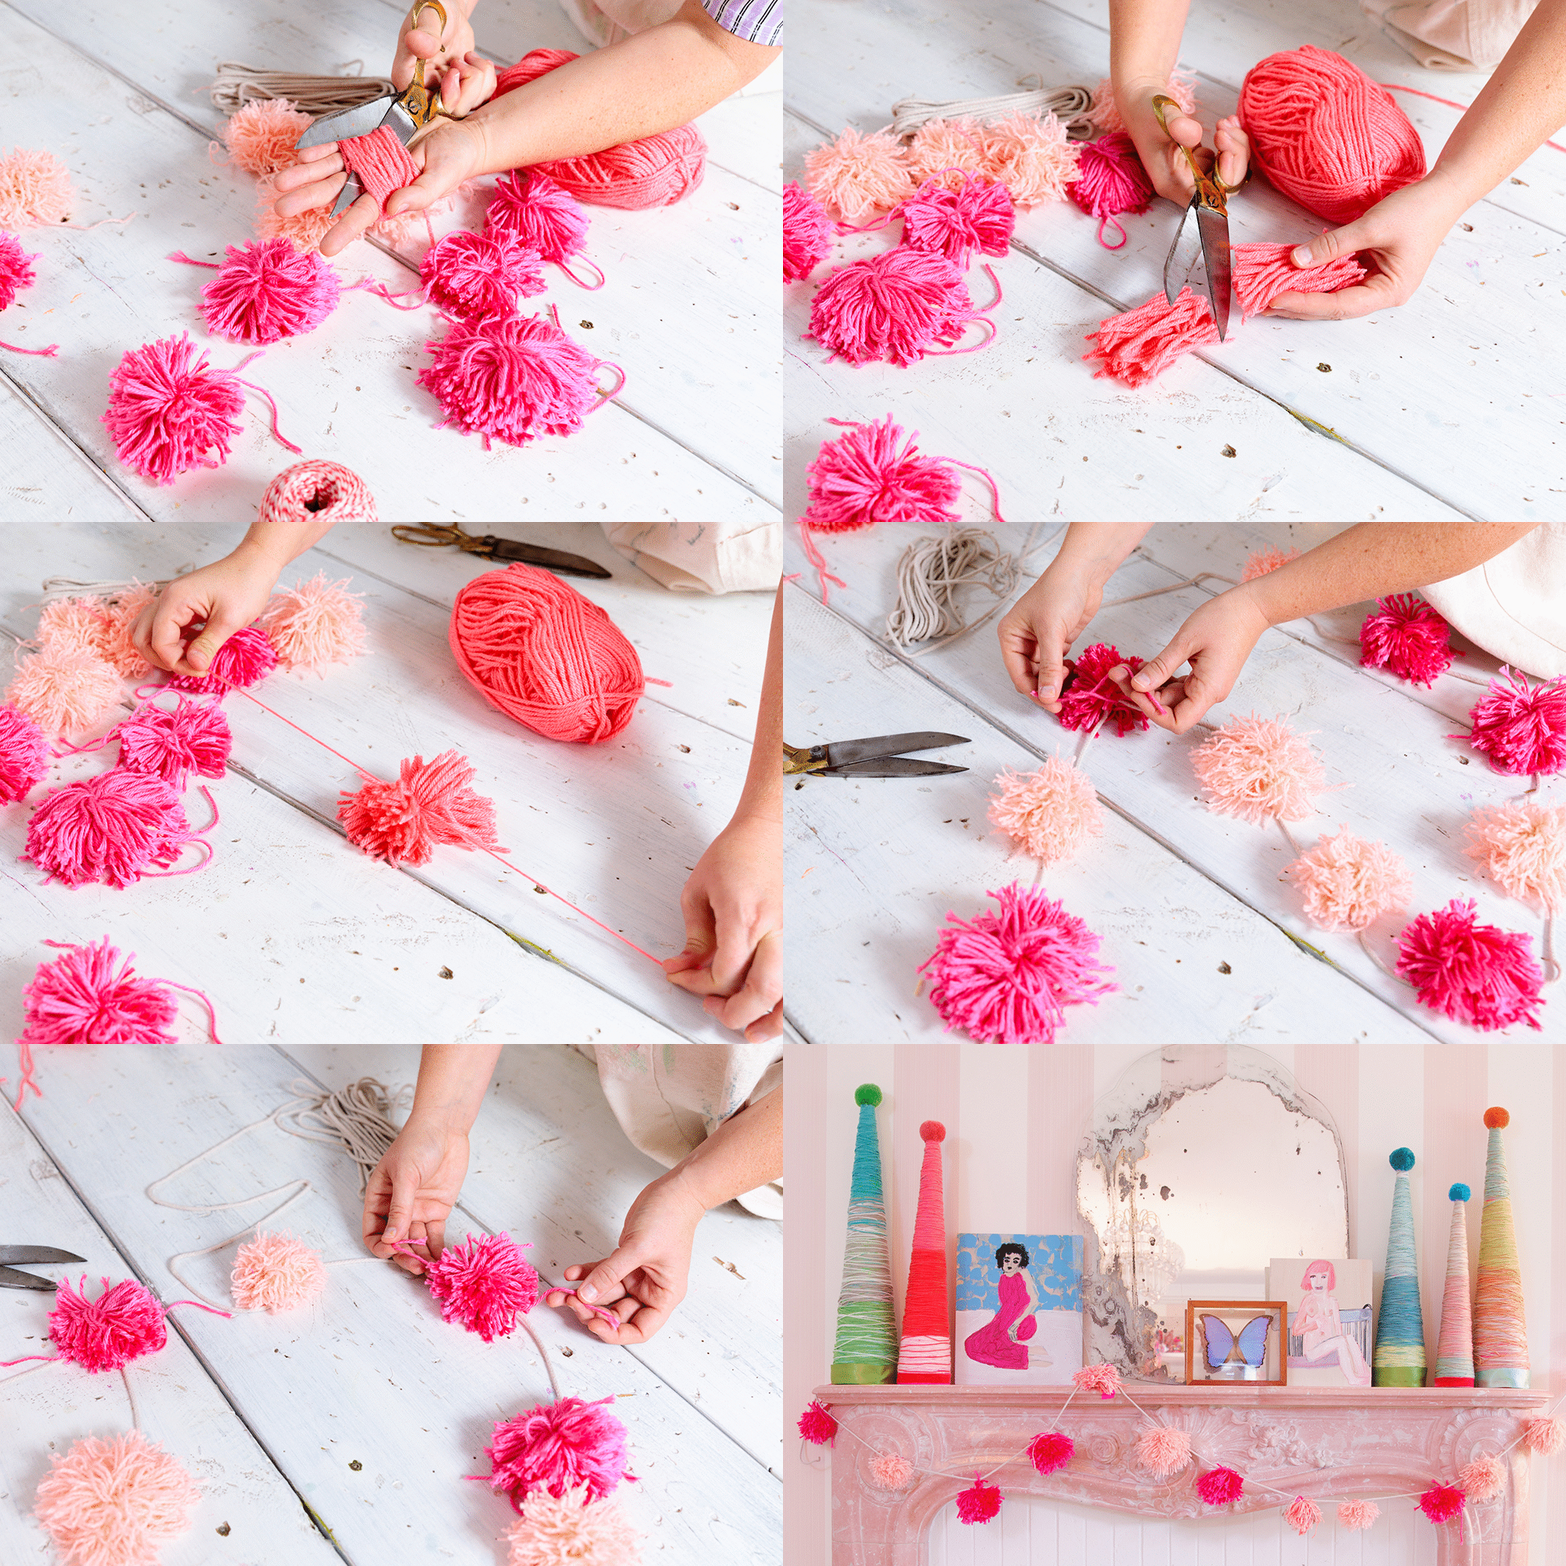
Choose one yarn colour and wrap it around the palm of your hand several times (I’m talking at least 20 to 30. The more you wrap, the fluffier the pompom will be). Carefully slide the scissors under the wrap of yarn to cut the bundle. NOTE: Please be careful not to wrap the yarn too tightly. You’ll need to fit the scissors underneath your hand, and circulation is important. You also want to ensure you don’t cut yourself. Safety first, friends!
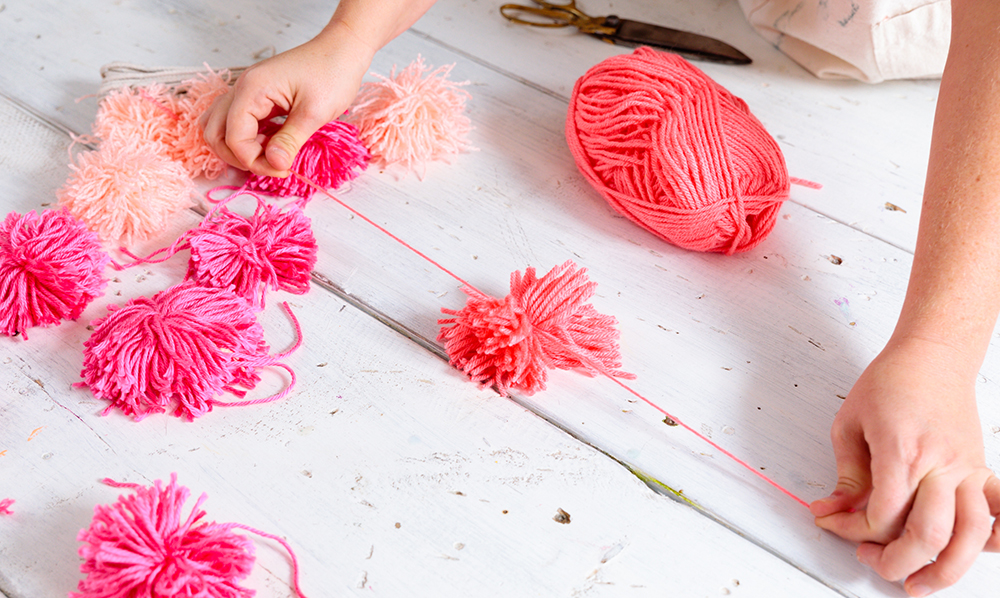
Pompom Garland: Step Two
Trim a piece of yarn, and use it to tie the center of the bundle. Make this piece of yarn longer than those in the bundle. Repeat these steps to create several pompoms – as many as you’d like!
Pompom Garland: Step Three
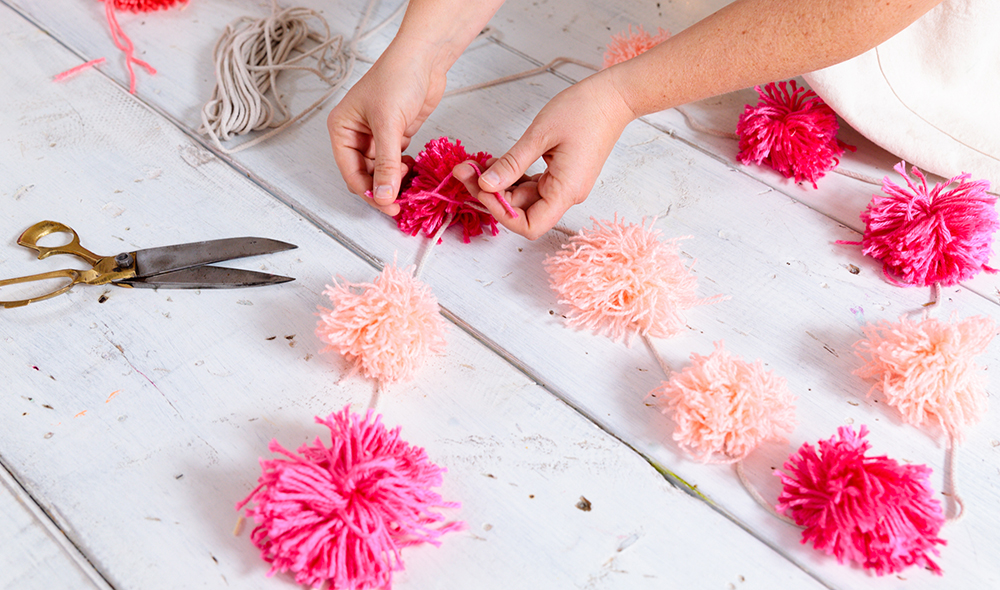
Cut a piece of string or cord at the desired length of your garland. Using the longer pieces you used to bind the bundles, attach the pompoms at various points along the string.
Pompom Garland: Final Product!
Fluff up those pompoms! Gently shake each one out to get them into their finest fuzzy form. Then hang your garland and feel your space pop with all the colourful and welcoming vibes! Looking for more easy (and stylish) holiday DIYs? Check out these unique chalk-paint wrapping paper ideas!
HGTV your inbox.
By clicking "SIGN UP” you agree to receive emails from HGTV and accept Corus' Terms of Use and Corus' Privacy Policy.


