
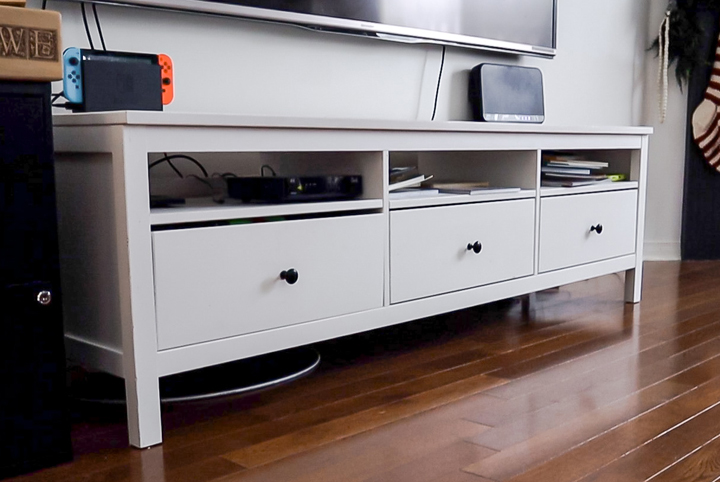
Many of us have furniture from IKEA kicking around. We brought them into our homes because the simple design was affordable and functional, but after a few years we’re ready for a change. The HEMNES line is made from solid wood and made to last, so getting rid of these pieces can really seem like a waste. Let’s keep those HEMNES TV Consoles out of the landfill and add a touch of trendy cane webbing, a coat of paint and some new hardware to bring it back to life…
Related: Simple IKEA Hack Evolves into Booming Business for Two People
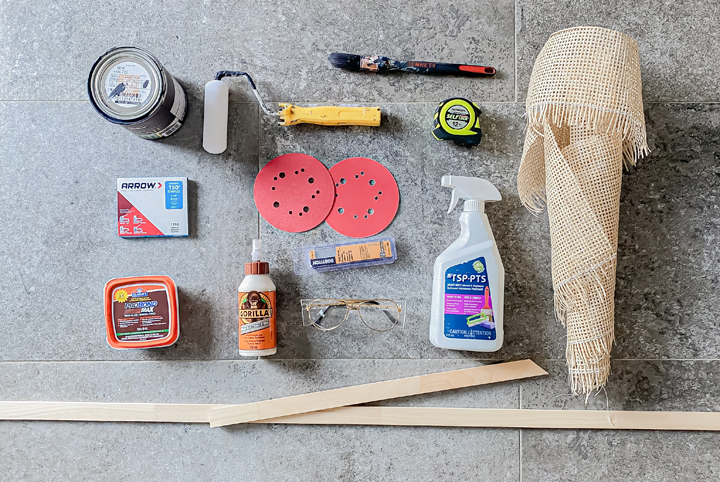
Materials Required:
● Hemnes TV stand
● 1″ finger jointed pine
● Cane webbing
● New hardware
● TSP (or dish soap and vinegar)
● Wood filler
● Wood glue
● Chalk paint
● Finishing wax
● 5/8″ Brad nails
● 1/4″ staples
● Foam paint roller
● Paint brush
● Tape measure
● Safety glasses
Related: This Fearlessly Decorated Farmhouse by DIY Danie is Seriously Amazing
Tools Required:
● Mitre saw
● Brad nailer
● Staple gun
● Sander or sanding block
Step One: Prep
If your IKEA TV stand isn’t new, you’ll want to make sure it is free from grease and debris. Clean it down with TSP (or alternatively you can use a mixture of dish soap and vinegar).
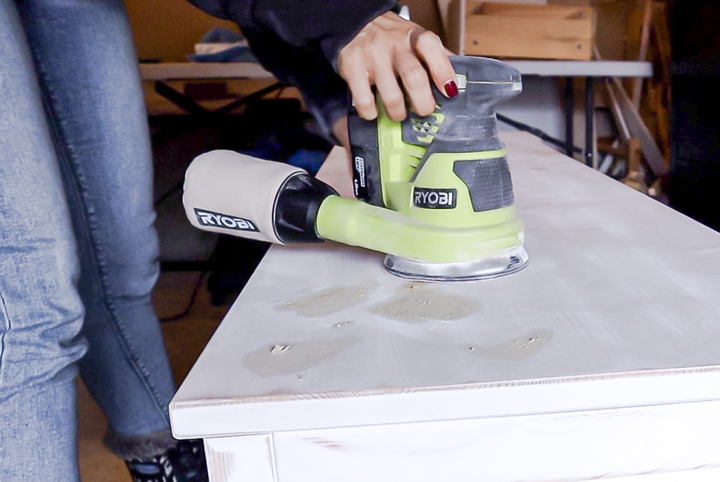
Fill in the original hardware holes with wood filler and let dry before sanding down the entire piece with 120 and then 220 grit sandpaper.
Step Two: Paint
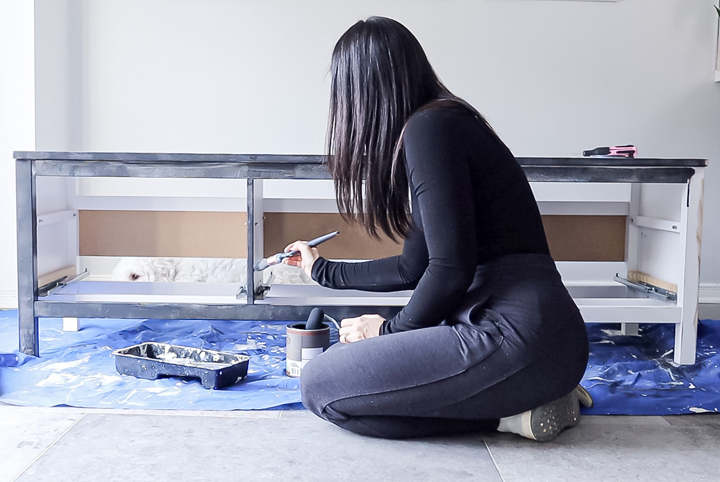
Use a small foam paint roller to apply two layers of chalk paint to your TV stand. Use a brush to get into tight corners. Apply your coats of paint 2-3 hours apart and once it’s fully dry, apply a finishing wax to protect it.
Step Three: Cut Trim
Take your pine lattice and cut to size using a mitre saw. Mitre the edges at 45 degrees and cut 2 pieces at 22″ long, and 2 pieces at 8″ long, for each drawer front. Give these pieces 2 coats of paint and let them dry.
Related: This Chill Condo Proves You’re Never Too Old for IKEA
Step Four: Soak Cane
Soak your cane webbing in warm water for 30 minutes. It is very stiff and rigid when it is dry, but will soften and expand in water. Soaking the cane not only makes it easier to work with, but once installed, it will shrink, smooth, and tighten as it dries.
Step Five: Cut and Install Cane
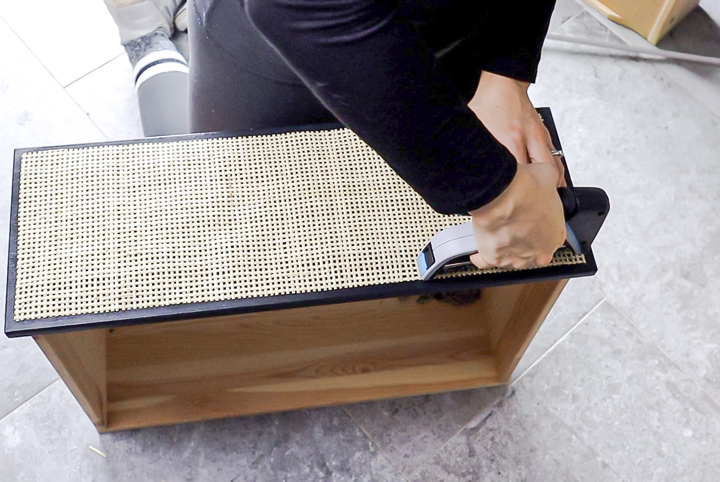
Cut your cane into rectangle pieces that are 21 x 7 inches. Centre these pieces on your drawer fronts and staple them into place using 1/4″ staples. Place a staple every 3 inches or so around the perimeter of the cane.
Related: Must-Know Reno Hacks That Will Save You Time and Money
Step Six: Install Trim
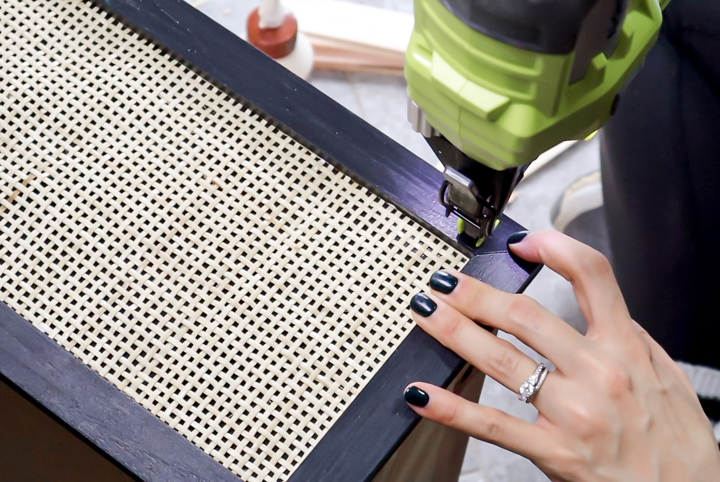
Place your trim pieces around the perimeter of your drawer fronts, covering the raw edge of the cane. Apply wood glue and set in place using 5/8″ brad nails.
Fill in any gaps and holes on your trim with wood filler. Let it dry and sand smooth. Then carefully go over with a coat of paint using a foam roller.
Related: How to Upcycle an Old Tire and Make a Cute Rope Ottoman in Just 4 Steps
Step Seven: Hardware
Install your drawer hardware.
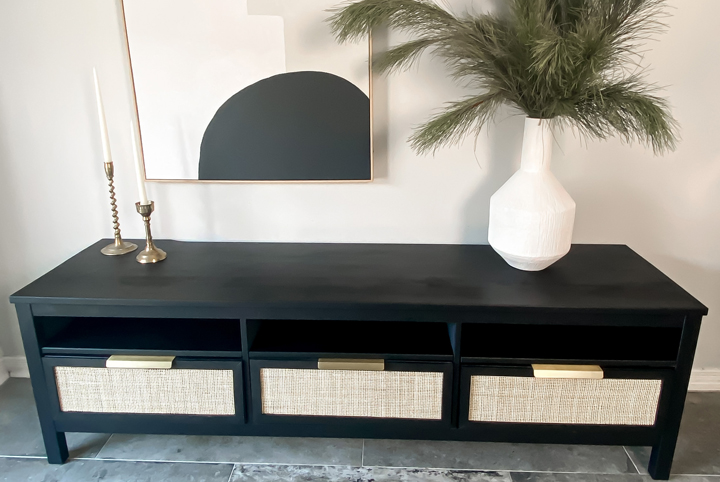
Enjoy your new TV console while feeling great about upcycling something that might have otherwise ended up in the trash!
To watch Courtney complete this IKEA TV stand upcycling hack, check out the video below:
Related: Simple DIY Home Upgrades That Will Add Serious Value to Your Home
Images and video courtesy of Courtney Ryall
HGTV your inbox.
By clicking "SIGN UP” you agree to receive emails from HGTV and accept Corus' Terms of Use and Corus' Privacy Policy.


