
Tiffany Pratt is the Queen of Craft. Known for her signature colourful style, Tiffany has brought her unique sense of design to HGTV Canada’s Buy It, Fix It, Sell It and Home to Win.
One of the most precious gifts that you can be given, in my opinion, is a handmade card. There are few things in life that are as sentimental or cherished as the handmade card. You may think that making your own DIY holiday cards sounds like quite the undertaking, but I assure you that it is not. If you keep your materials simple and make them in small batches, making your own holiday cards is as easy as one, two, three!
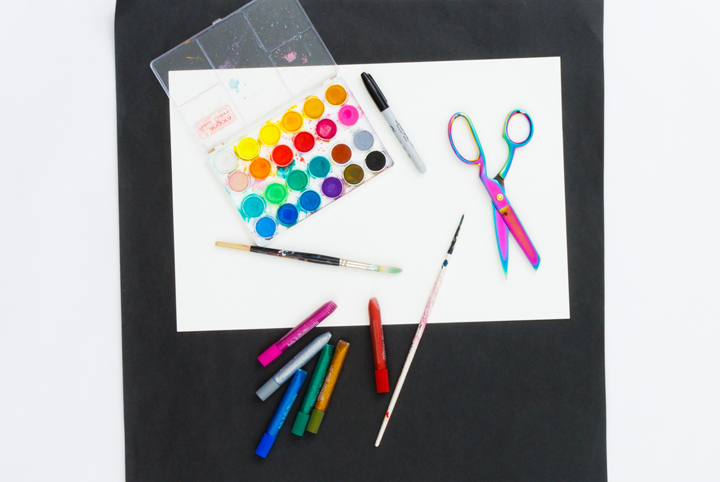
Materials for Making a DIY Christmas Card: watercolour paper, a watercolour paint kit, small paint brushes, glitter glue pens, scissors and a sharpie.
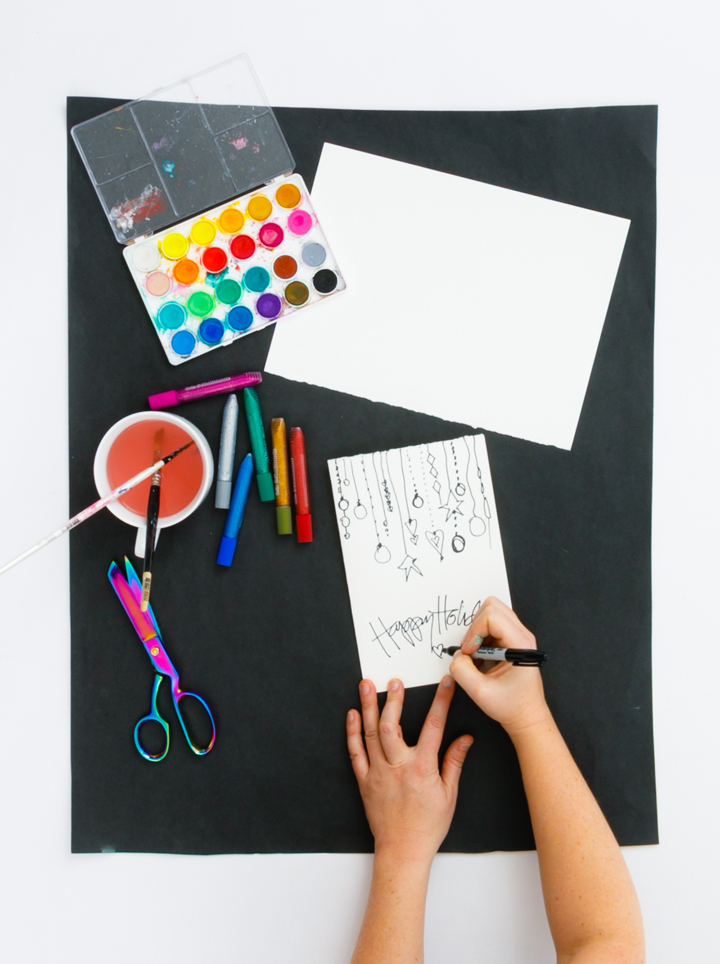
Step One: Fold Water Colour Paper into Cards and Sketch Your Message
I recommend buying water colour paper in a pad so that you can rip the pages out and cut cards into whatever size you want. Once you have cut and folded the cards into the sizes that you want, then you can begin drawing shapes, outlines, words, phrases and designs all over the front of the card in permanent markers or pens. I like using a black sharpie for my outlines, but you can choose whatever you want. The beauty of making your own cards is that you can customize them for your family and friends, so get creative and craft truly personal messages.
Step Two: Add Colour to Your Holiday Message
Once you have finished with all of your drawing, writing and designing, then you can begin painting in the lines and adding the magic of colour. I have a simple watercolour kit that I pull out for occasions just like this. You can find watercolour kits with a variety of colours at any craft store. The beauty of them is that you just need to add water and swirl your brush around and you’ll have beautiful transparent but rich colour. Have fun painting in your lines!
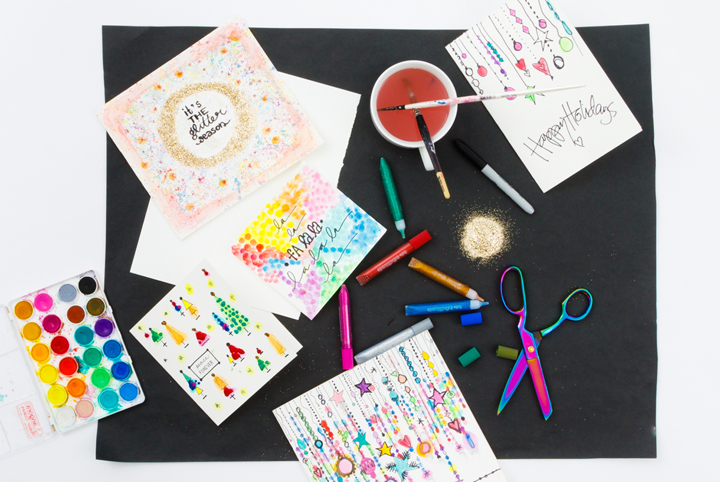
Step Three: Add Holiday Sparkle to Your Cards
When the paint is dry, this is the time to add the glitz and glitter! I love using glitter glue pens for little projects like this because they are more mechanical and are both glue and glitter together. If you wanted to add more glitter onto the glitter glue you can and I love that! You can add glitter in certain places-or just go crazy. Hey, it’s the glitter season, right? You can do whatever you want!

Everyone loves a beautiful handmade card and I promise you that if you spend a little time on these and a little less money at the store, you will find that the gifts mean less and the sentiment of this gesture will mean everything.
Images courtesy of Koko Photography

