If you’re lucky enough to get a bounty of trick-or-treaters each year, step up your game with a creative DIY treat bucket to hand out candy, or give your children a bedazzled bag of their own! From a glammed up pillowcase to a mask-adorned bucket, these 3 DIY treat bags are perfect for adults and kids alike – and are super simple to create.
Tiffany Pratt is the Queen of Craft. Known for her signature colourful style, she’s brought her unique sense of design to HGTV Canada’s Buy It, Fix It, Sell It and Home to Win.
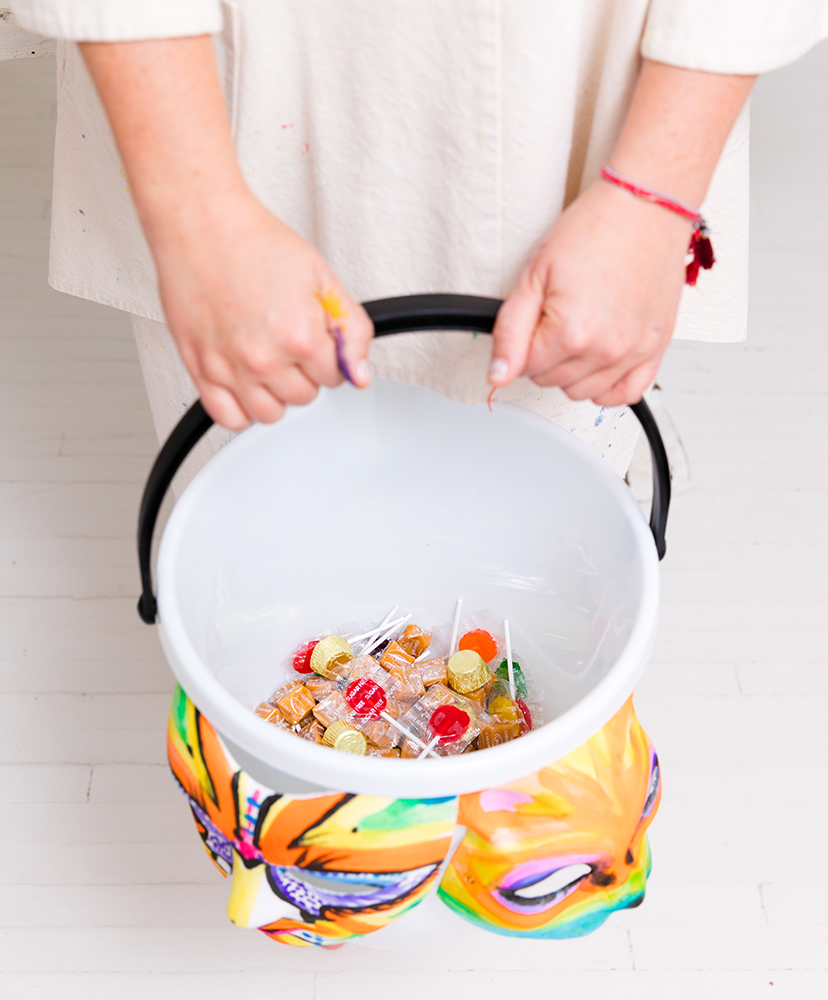
Fun Bucket
Flex your creativity with this bedazzled bucket! It’s a super fun and easy way to hand out candy to all the eager trick-or-treaters. The best part? You can use it as a bowl to store the Halloween treats your little ones collected.
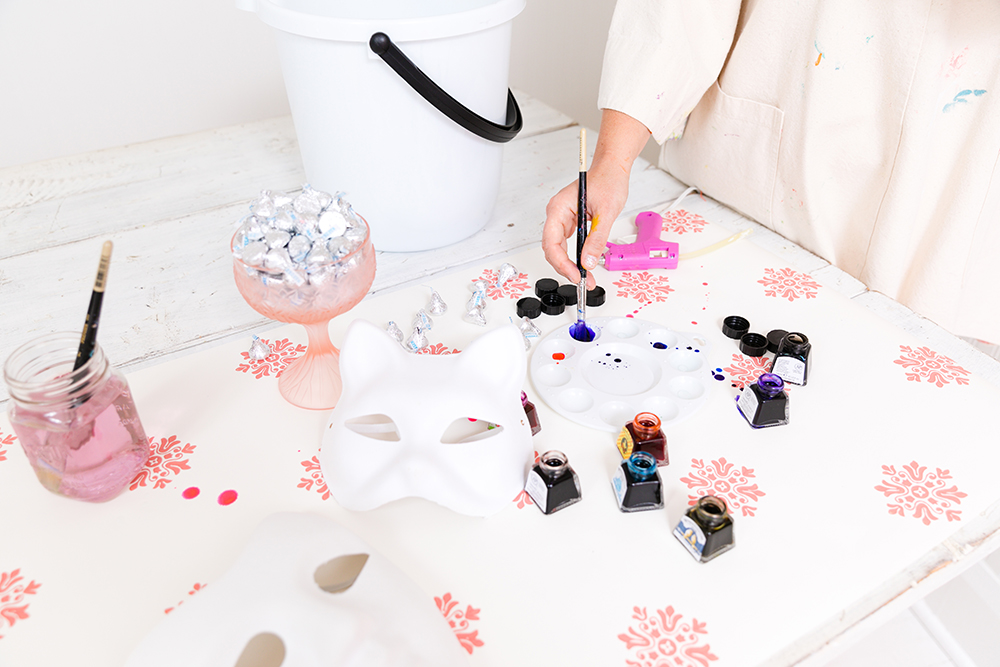
Fun Bucket: Materials
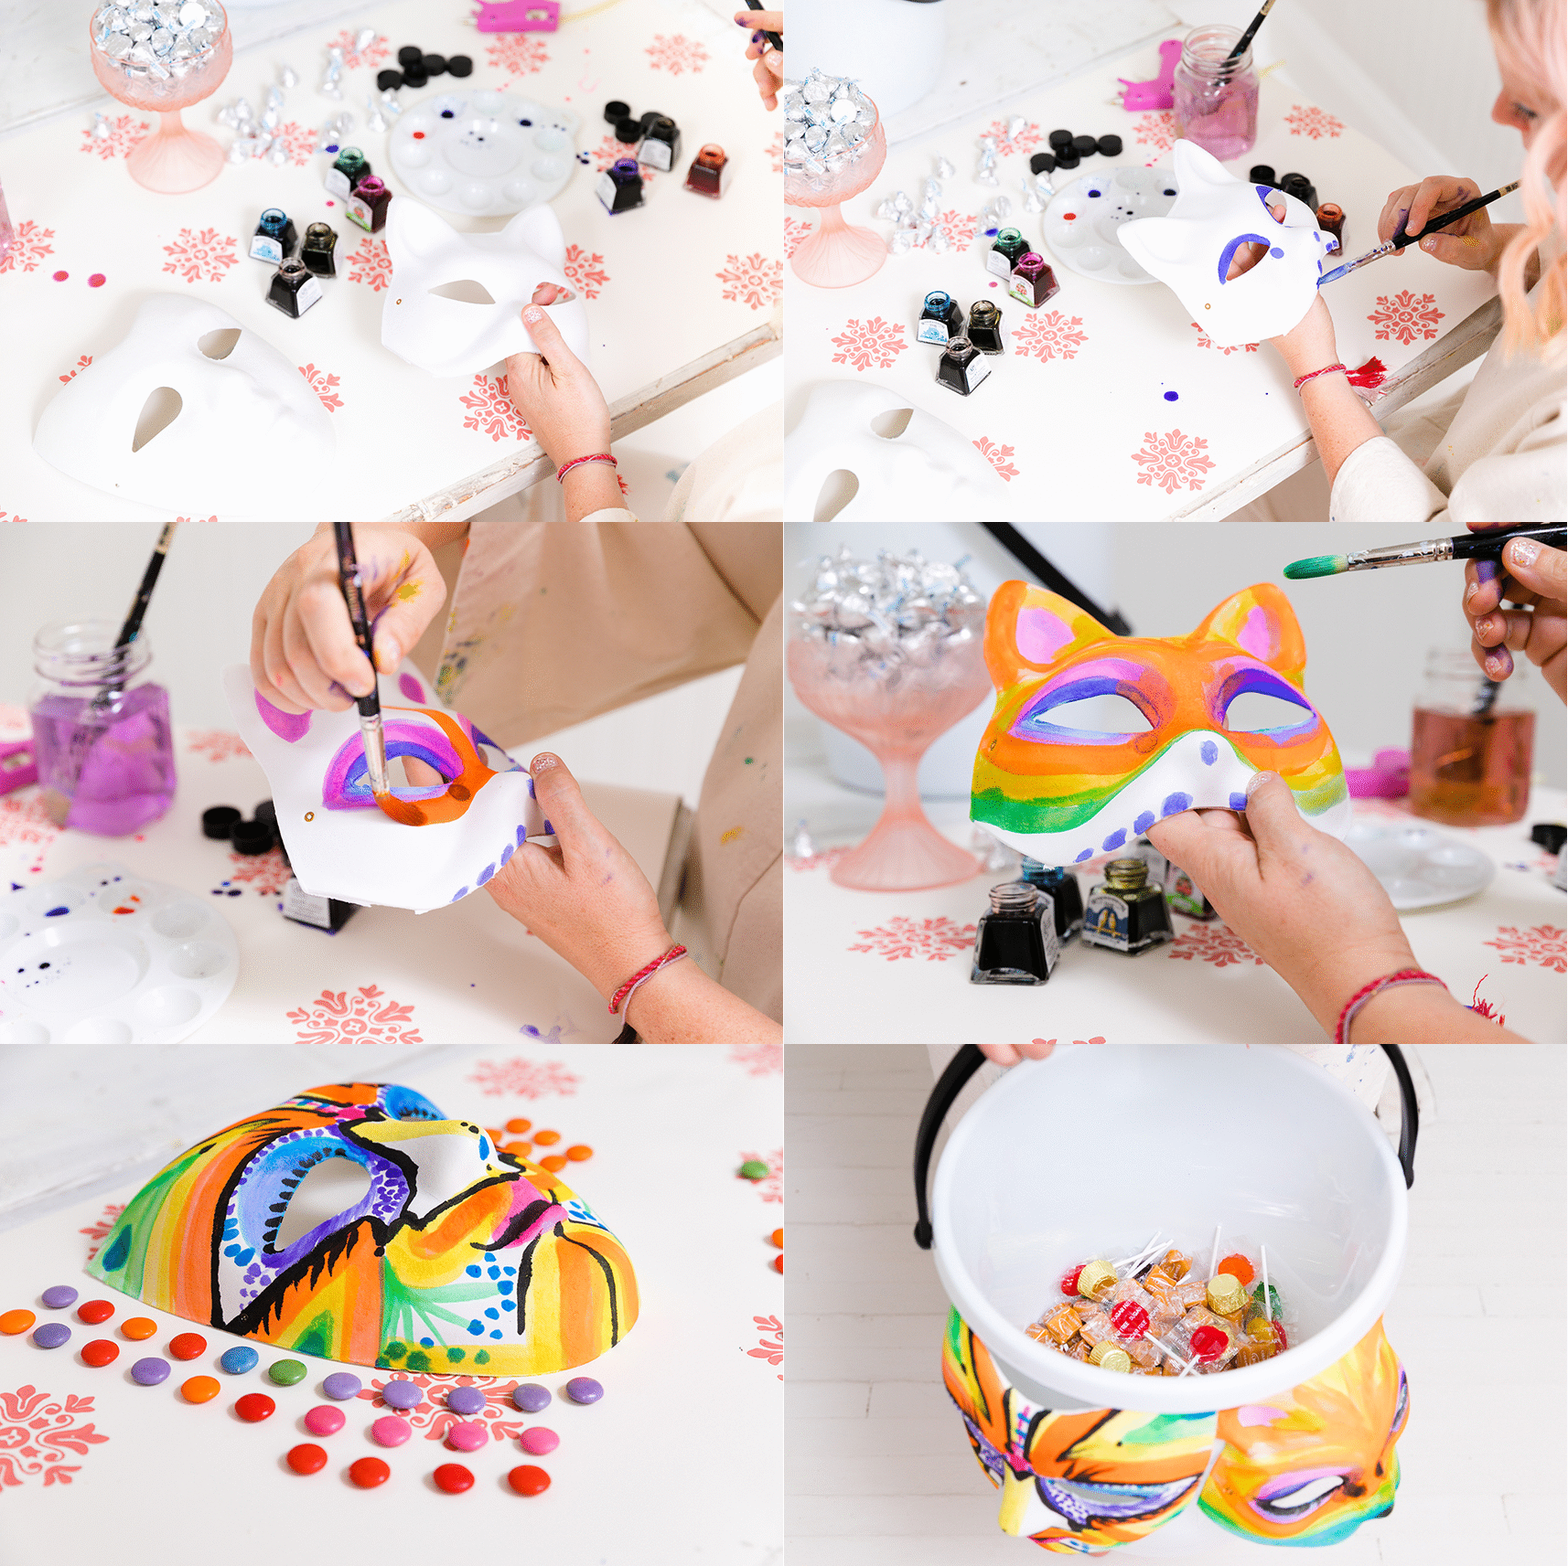
Here’s what you’ll need: a plastic white bucket, hot glue gun, liquid watercolour paints (available at an art supply store), assorted paint brushes, cup of water for painting and paper masks (I got these at the dollar store).
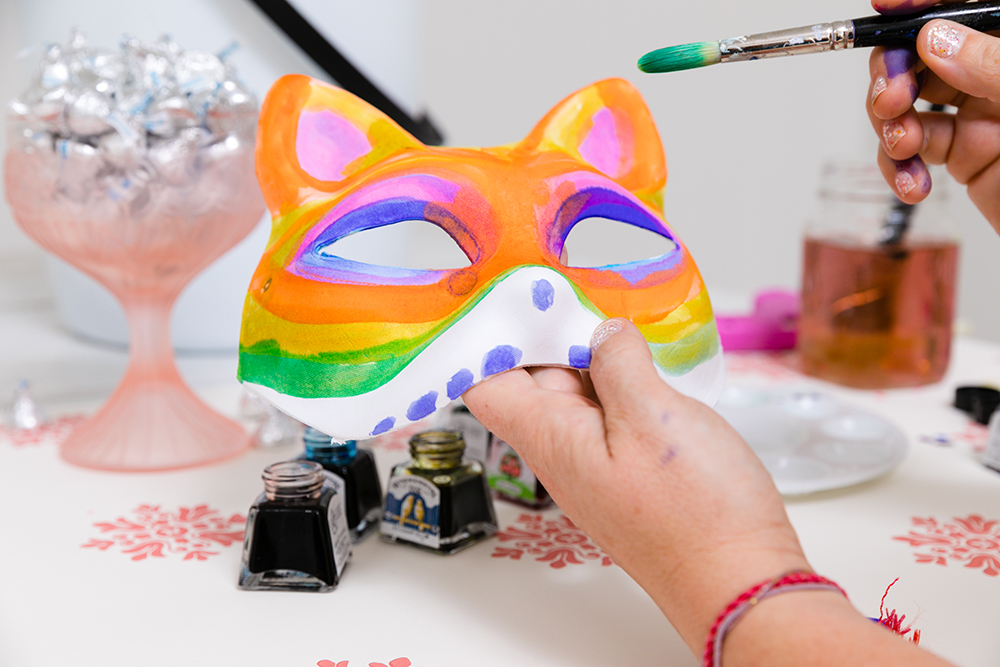
Fun Bucket: Step One
Using the liquid watercolours, let your imagination fly and create patterns and designs all your own. The watercolour dries quickly, and the colours layer so nicely that you can’t go wrong! You can even decorate the paper masks with sequins – but be sure to let the paint dry first.
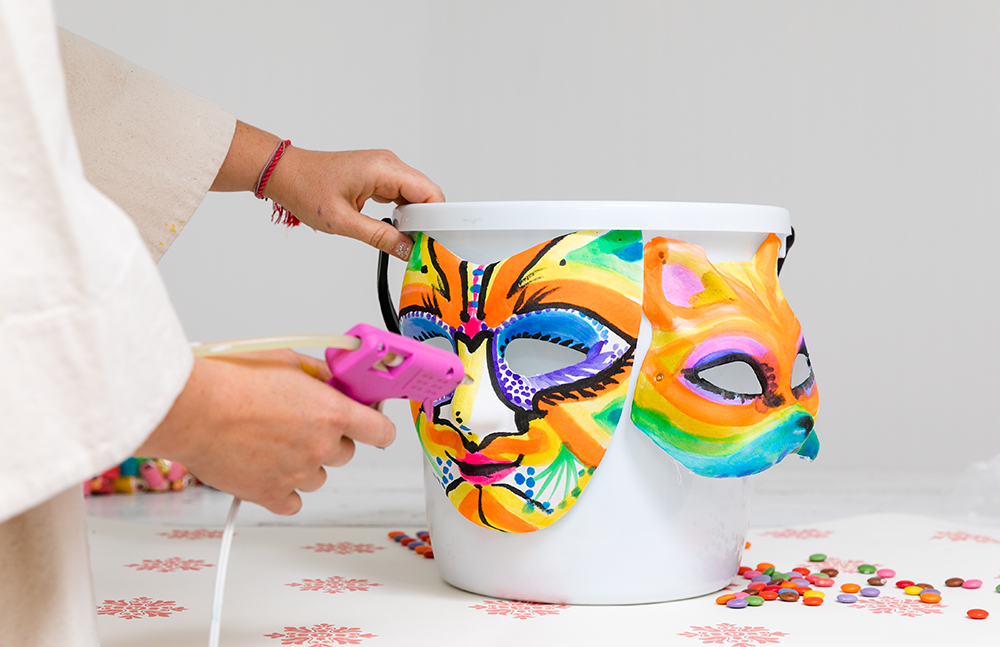
Fun Bucket: Step Two
Use hot glue to affix the masks to your plastic bucket. You can cover the bucket in multiple masks, or use a larger one as a focal point. You make the rules!
Fun Bucket: Final Product!
In just a few simple steps, you can take a plastic bucket from boring to beautiful. Once the candy is gobbled up, repurpose your colourful creation as a fun storage piece to stow away small toys and treasures until it’s ready to make its annual debut next Halloween
Mini Treat Bags
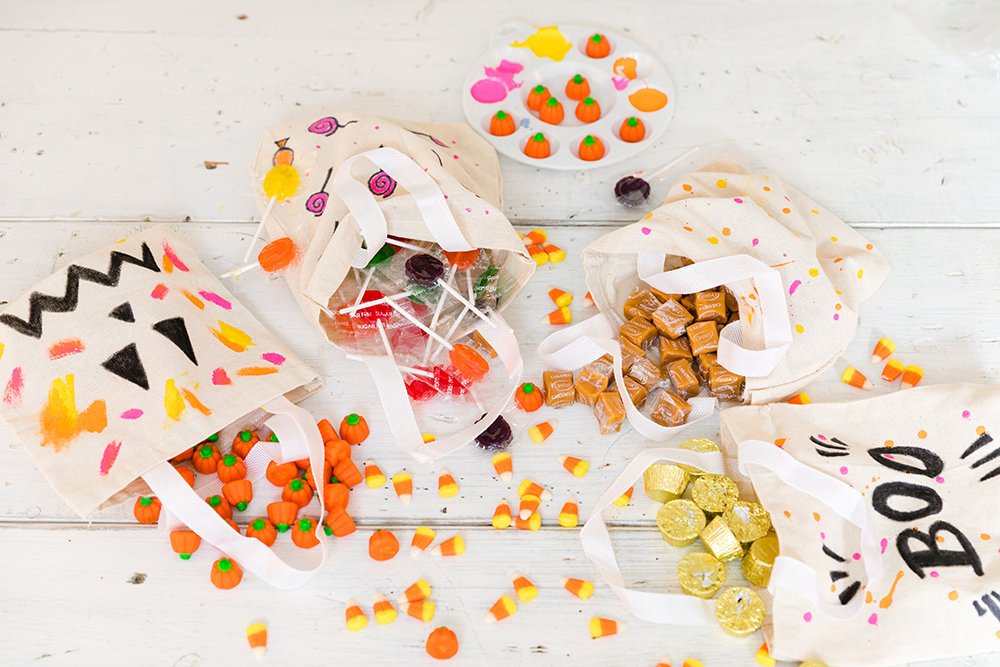
When the tiny people head out for their first few Halloweens, you know they’re going to want to fill their trick-or-treat bag to the brim like the big kids. Make that dream come true in only a handful of easy steps. These mini treat bags are the perfect size for all the little ones in your life.
Mini Treat Bags: Materials
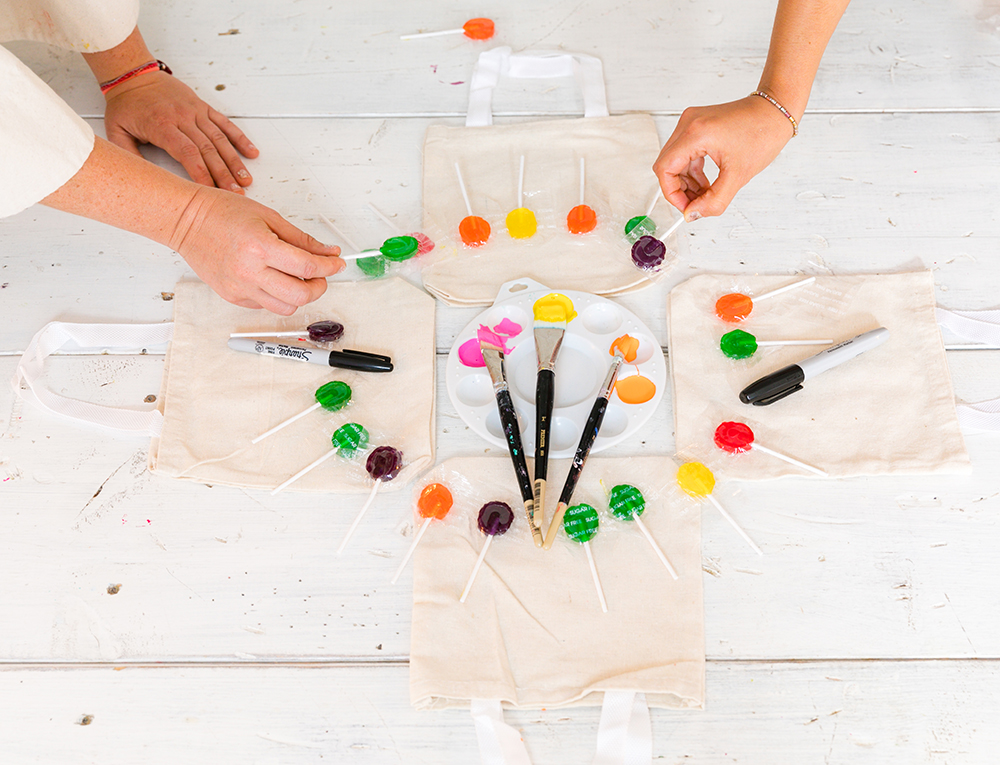
Here’s what you’ll need: mini canvas bags (available at a dollar store), permanent markers, acrylic paint and paint brushes (plus lollipops for snacking!).
Mini Treat Bags: Step One
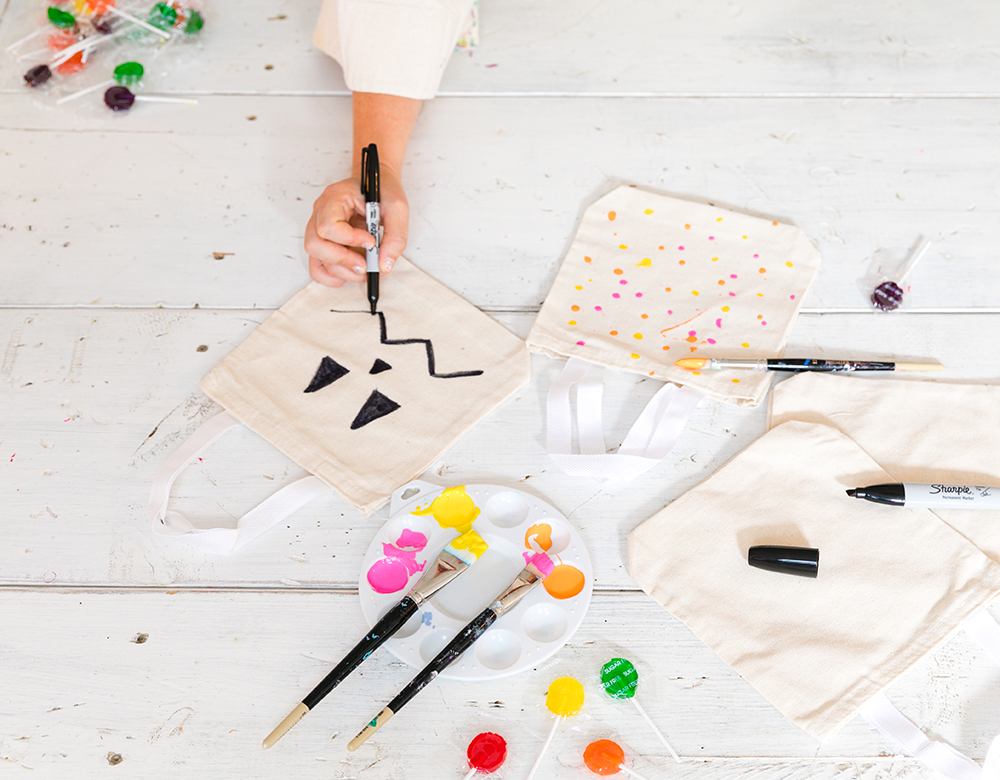
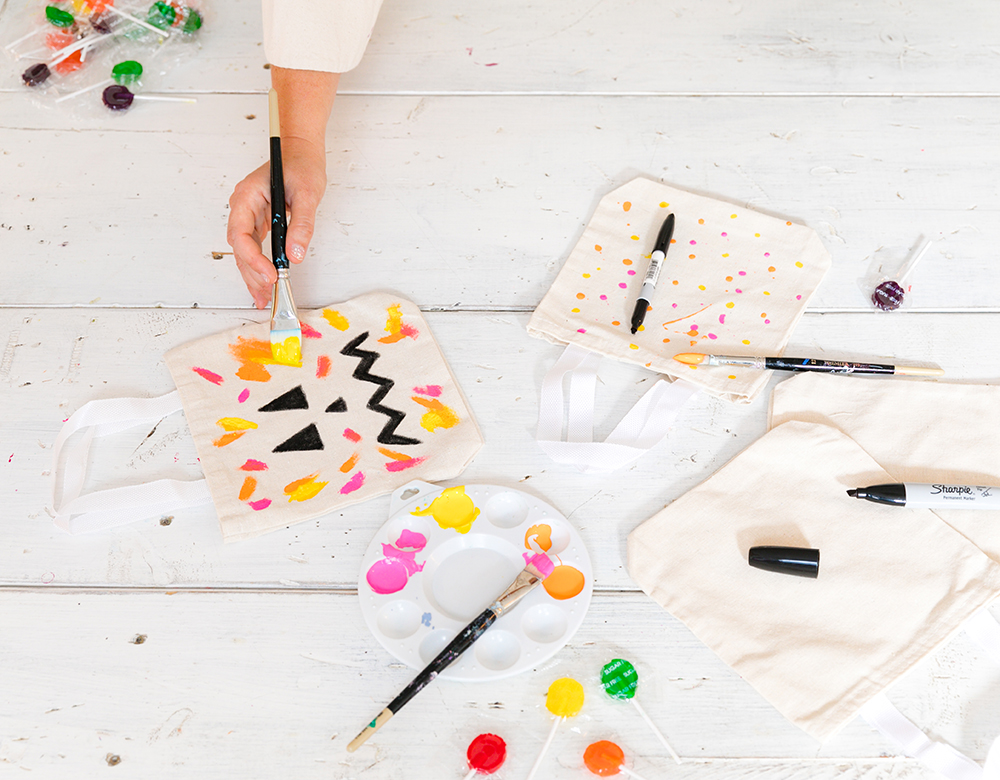
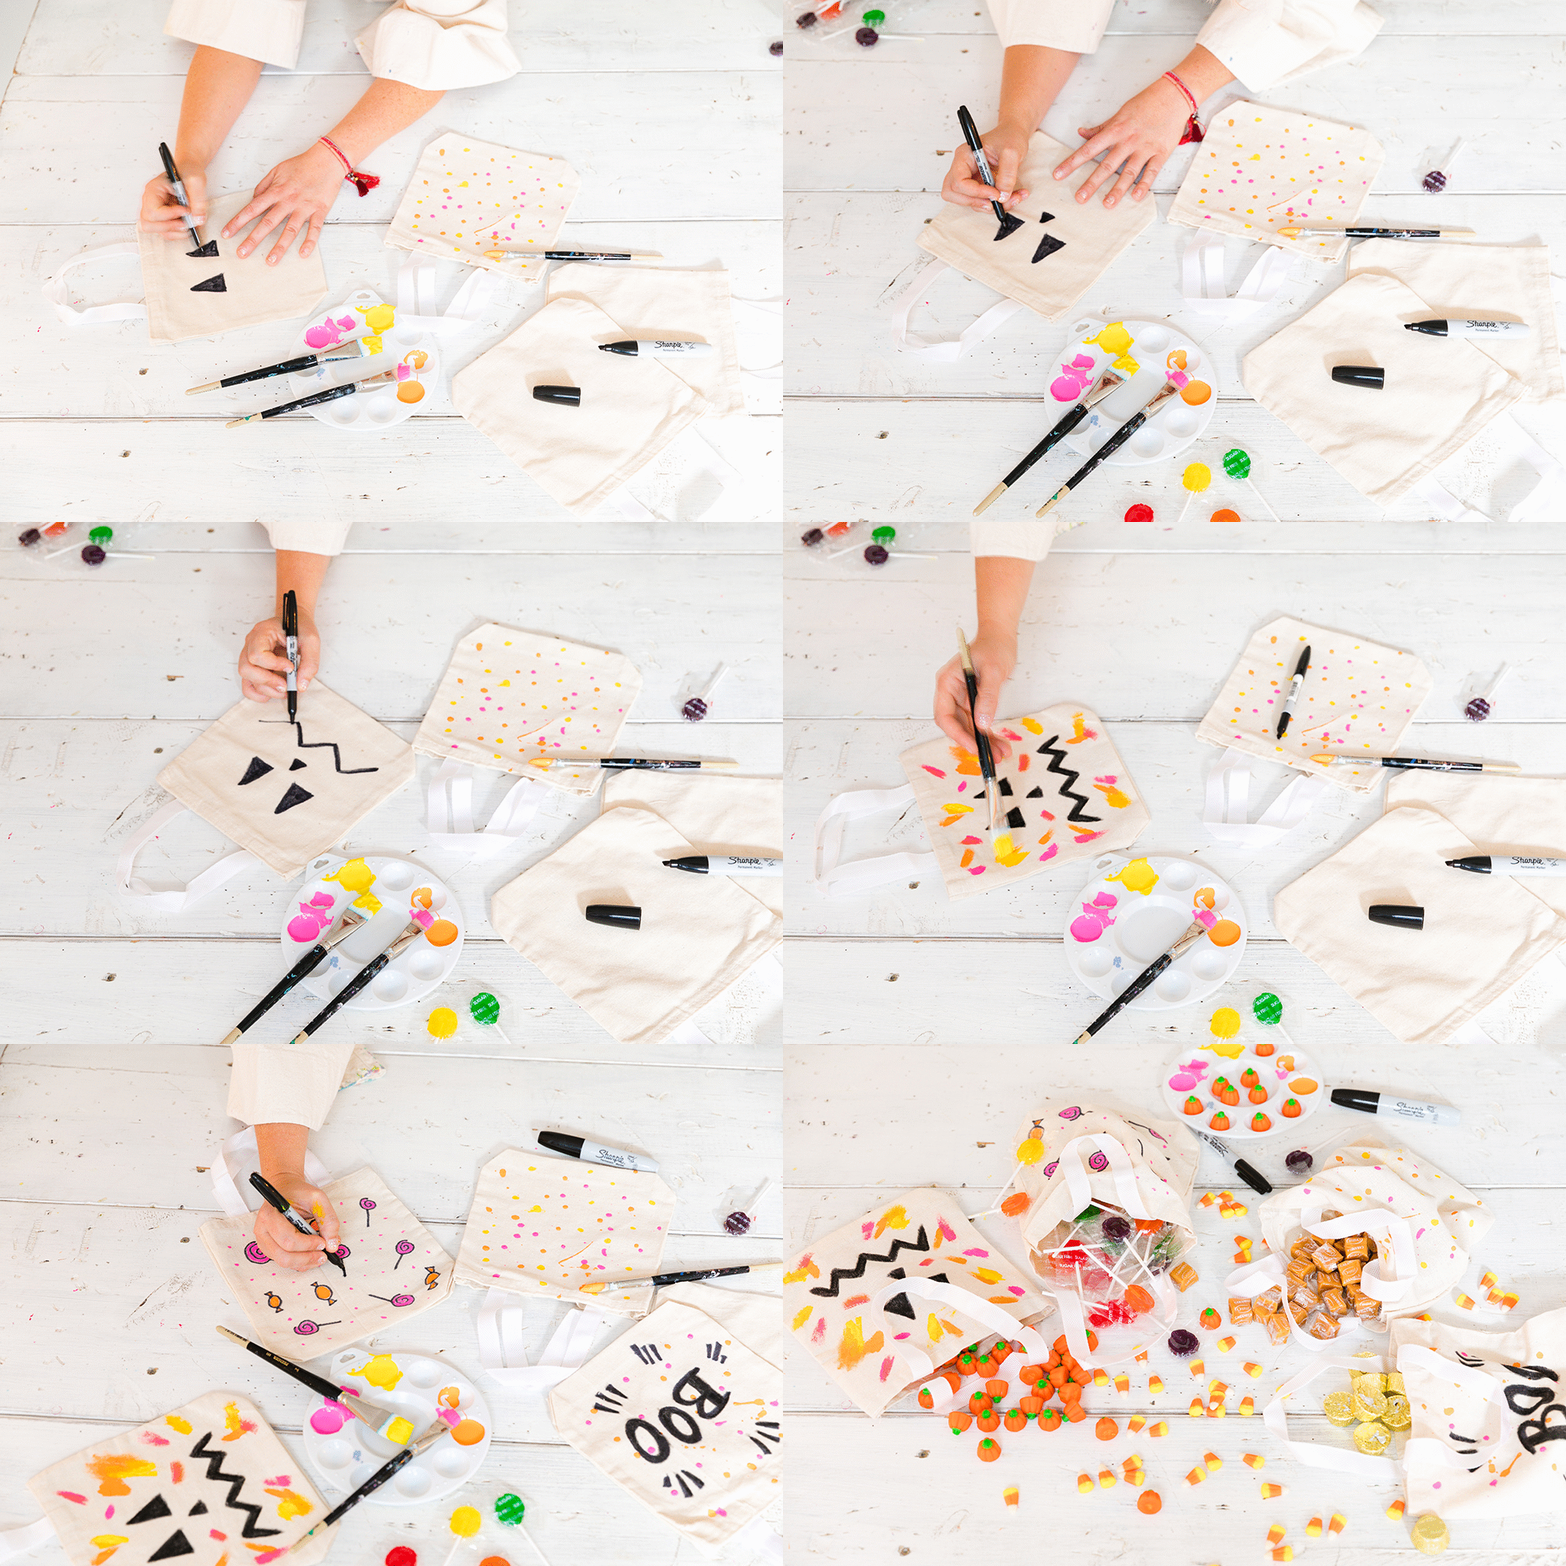
Using the sharpies, draw a ghost, ghoul or jack o’ lantern face on the front of the bag. You can swap out the sharpies for washable markers if you want to get the little ones in on the action!
Mini Treat Bags: Step Two
Use the acrylic paint to enhance the face you drew, or add a fun pattern to the bag. You can use any paint that you like. I used acrylic because it’s water-based for easy clean up and sticks nicely to the fabric.
Mini Treat Bags: Step Three
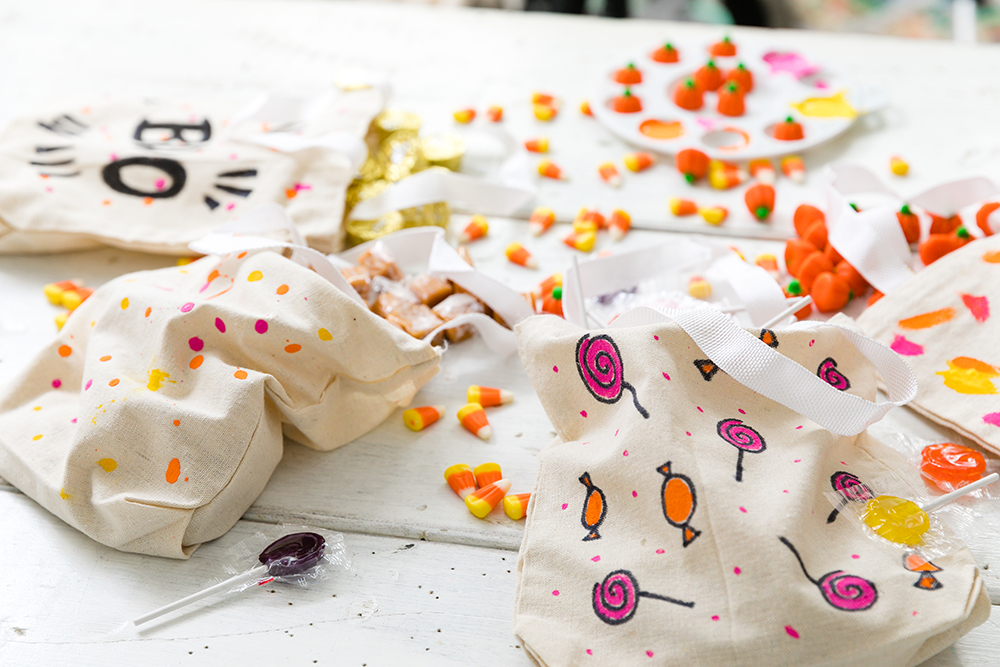
Have fun with different designs and colours for the remainder of the canvas bags (like the candy motifs and “Boo” lettering I drew on the totes pictured here). I love the size of these little bags because they are light to carry – they fill very quickly and are the perfect size to make your little one’s Halloween feel like a candy-gathering success!
Mini Treat Bag: Final Product!
Mini things are the way to go! These bags can also become a fun snack bag for school, and they even make great loot bags for parties. Get the kids involved for a fun crafting moment to enjoy with the family.
Pillowcase Treat Bag
Who else used a pillowcase to collect Halloween treats when they were a kid? I loved to maximize the number of treats I could carry. But a boring old pillowcase simply won’t do for a fun night of trick-or-treating. Here are a few simple steps to transform your kid’s pillowcase into a show-stopping treat bag that will wow the neighbours (and most importantly, hold tons of candy!).
Pillowcase Treat Bag: Materials
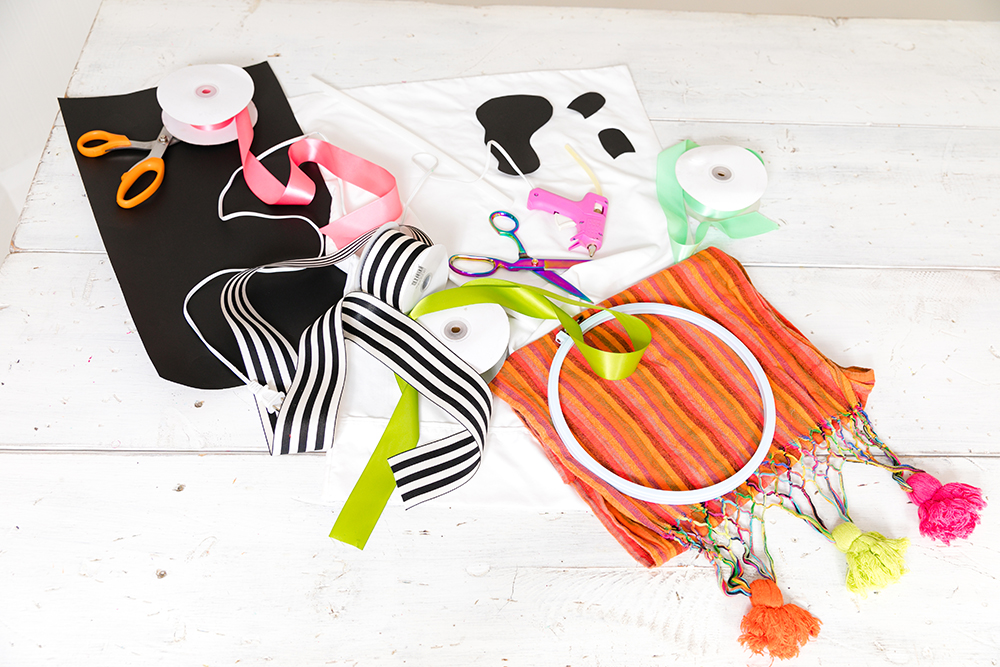
Here’s what you’ll need: a pillowcase, embroidery hoop, ribbon, Bristol board, scissors and a hot glue gun.
Pillowcase Treat Bag: Step One
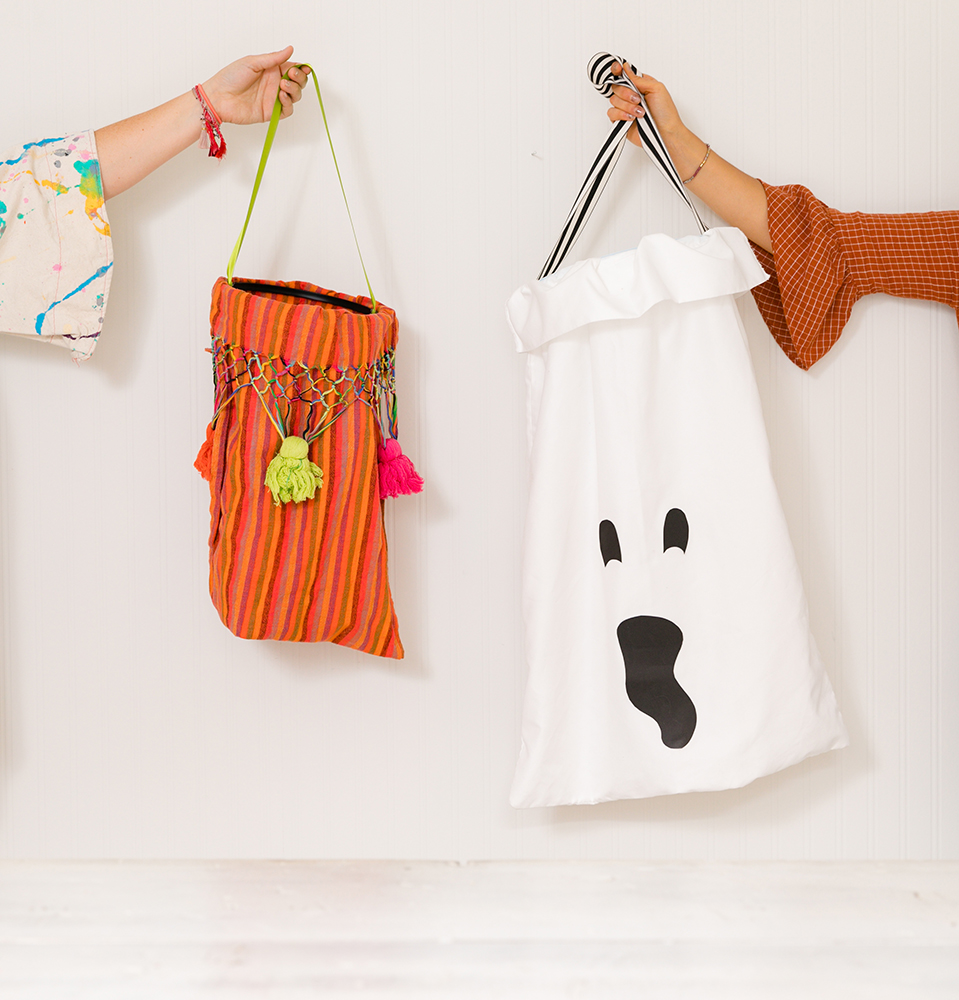
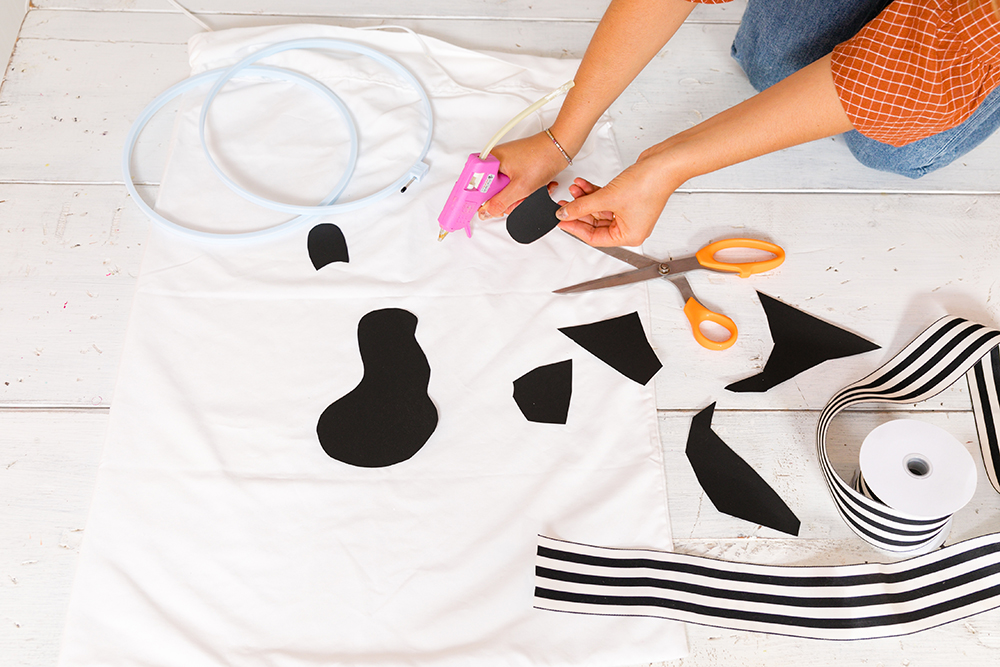
Cut out eyes and a mouth to create a ghost face from the Bristol board, and hot glue it to the pillowcase. I made a simple ghost face, but you can make this as simple or as intricate as you’d like!
Pillowcase Treat Bag: Step Two
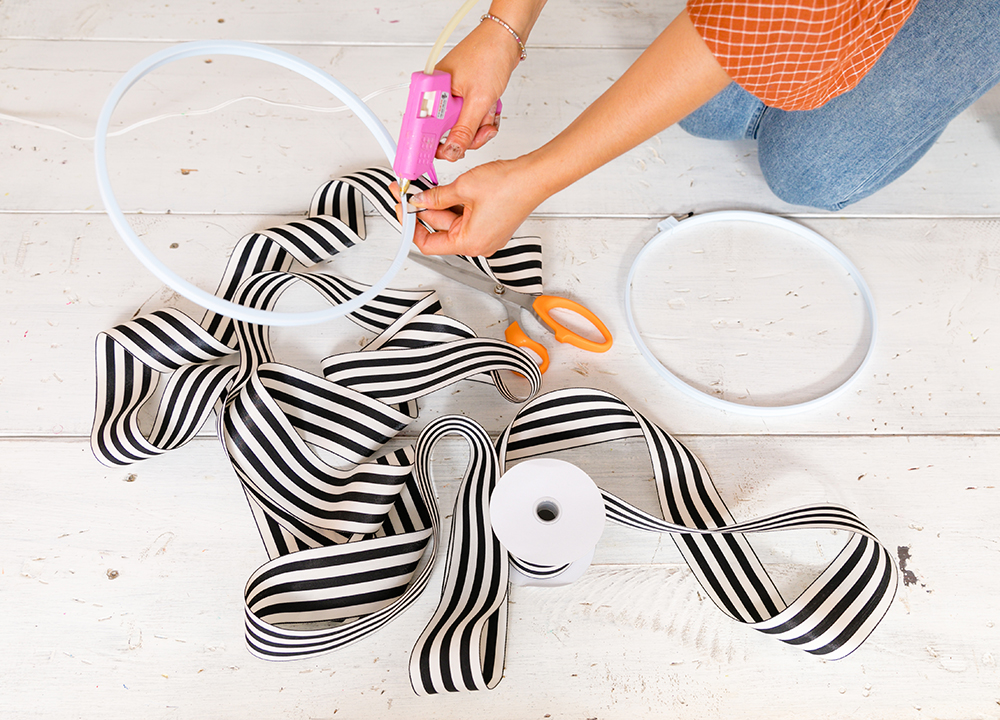
Measure out some ribbon to make a handle for the bag. Separate the embroidery hoop, and use the hot glue to attach the ribbon on either side of the larger outer hoop, creating a handle. I chose a thick striped ribbon to add more interest to the bag, but you can use whichever material or pattern you have lying around the house.
Pillowcase Treat Bag: Step Three
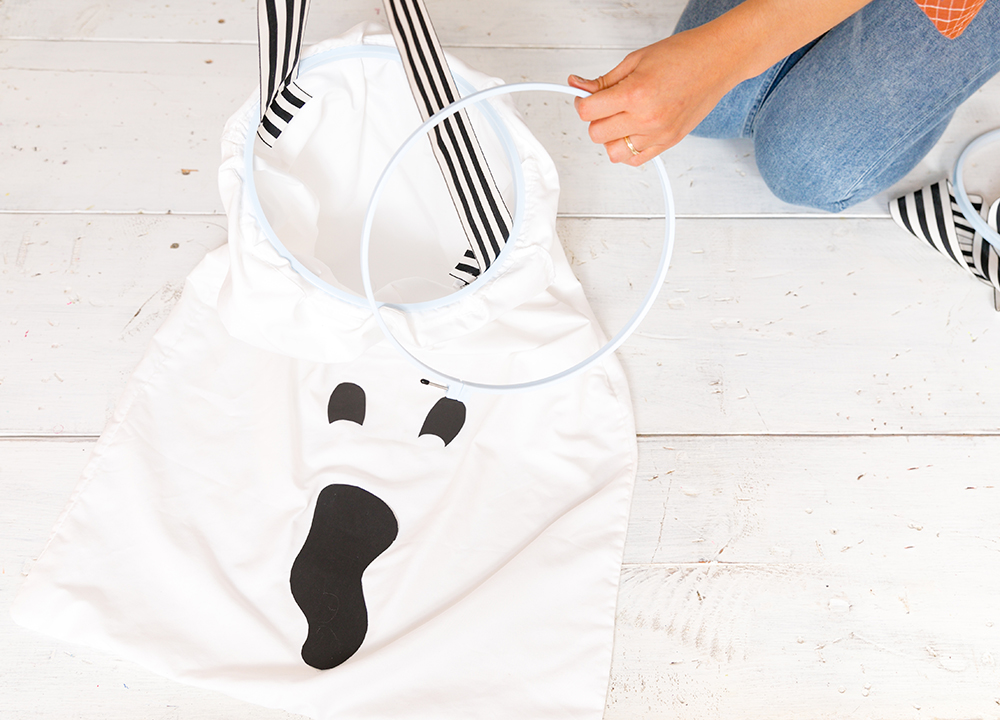
Think of the embroidery hoop as a set of nesting dolls. Wrap the pillowcase around the larger outer hoop, and then nest the smaller hoop inside to secure the pillow case in place.
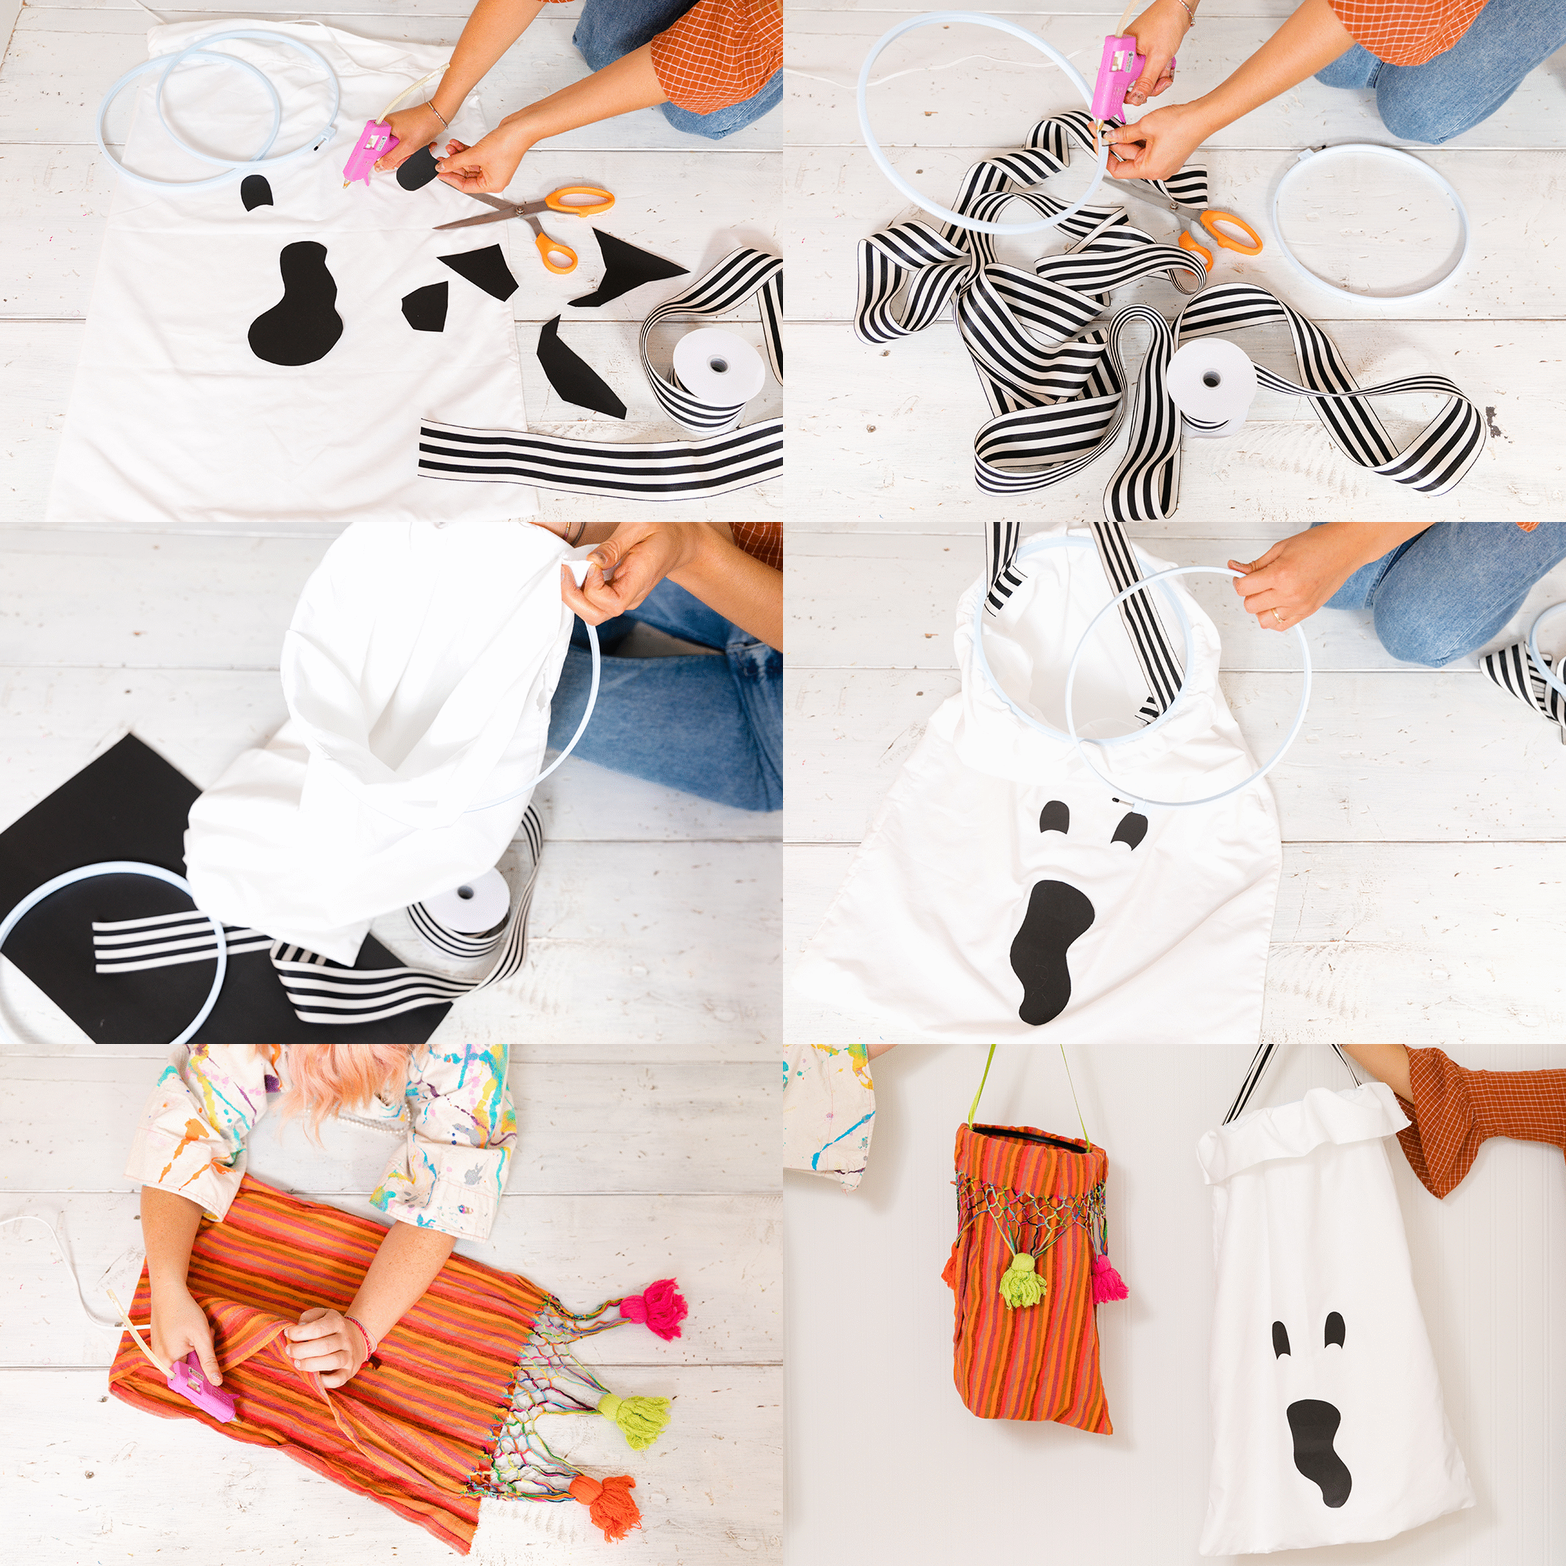
Pillowcase Treat Bag: Final Product!
Now that you’re rocking a super fun treat bag, go out there and collect that candy! Fill ’em up!
HGTV your inbox.
By clicking "SIGN UP” you agree to receive emails from HGTV and accept Corus' Terms of Use and Corus' Privacy Policy.


